In this tutorial we are going to learn how to create a seamless patterns that can be used as ground, water, or pretty much anything else that requires an edge connections. Thanks to the amazing way VoxelMax works, we can create such patterns easily.
To illustrate how this works, I’m going to show you how to create a water surface that will blend seamlessly and will allow you to use it as a starting point for your creation.
Starting The Scene
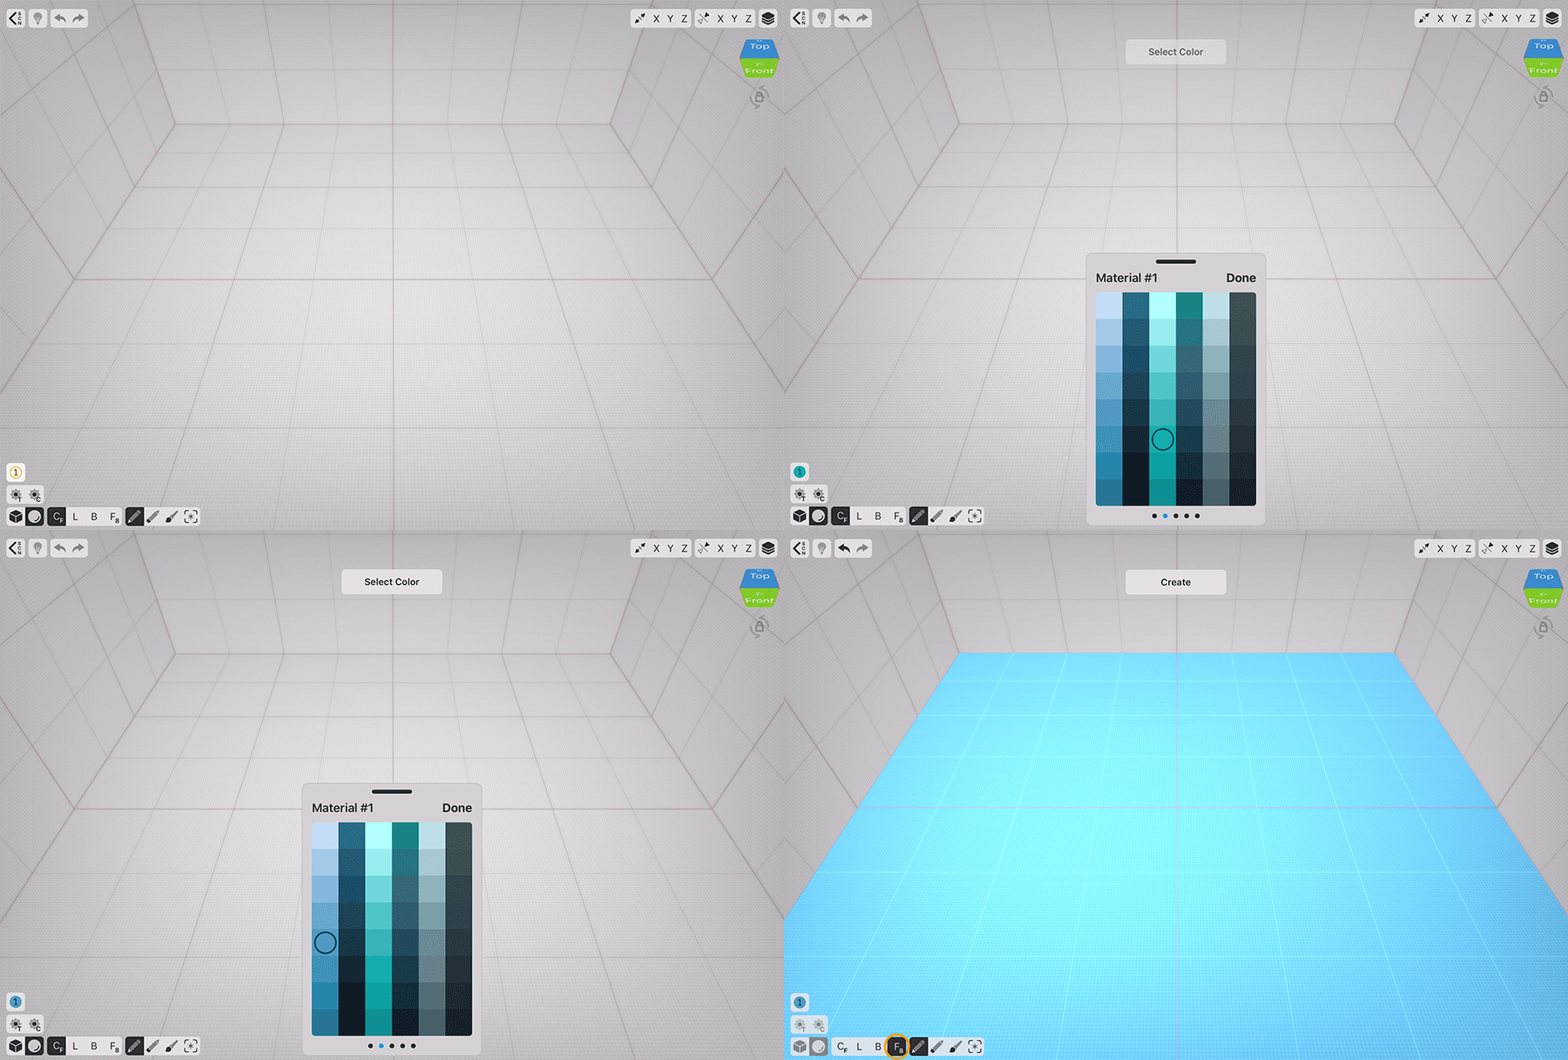
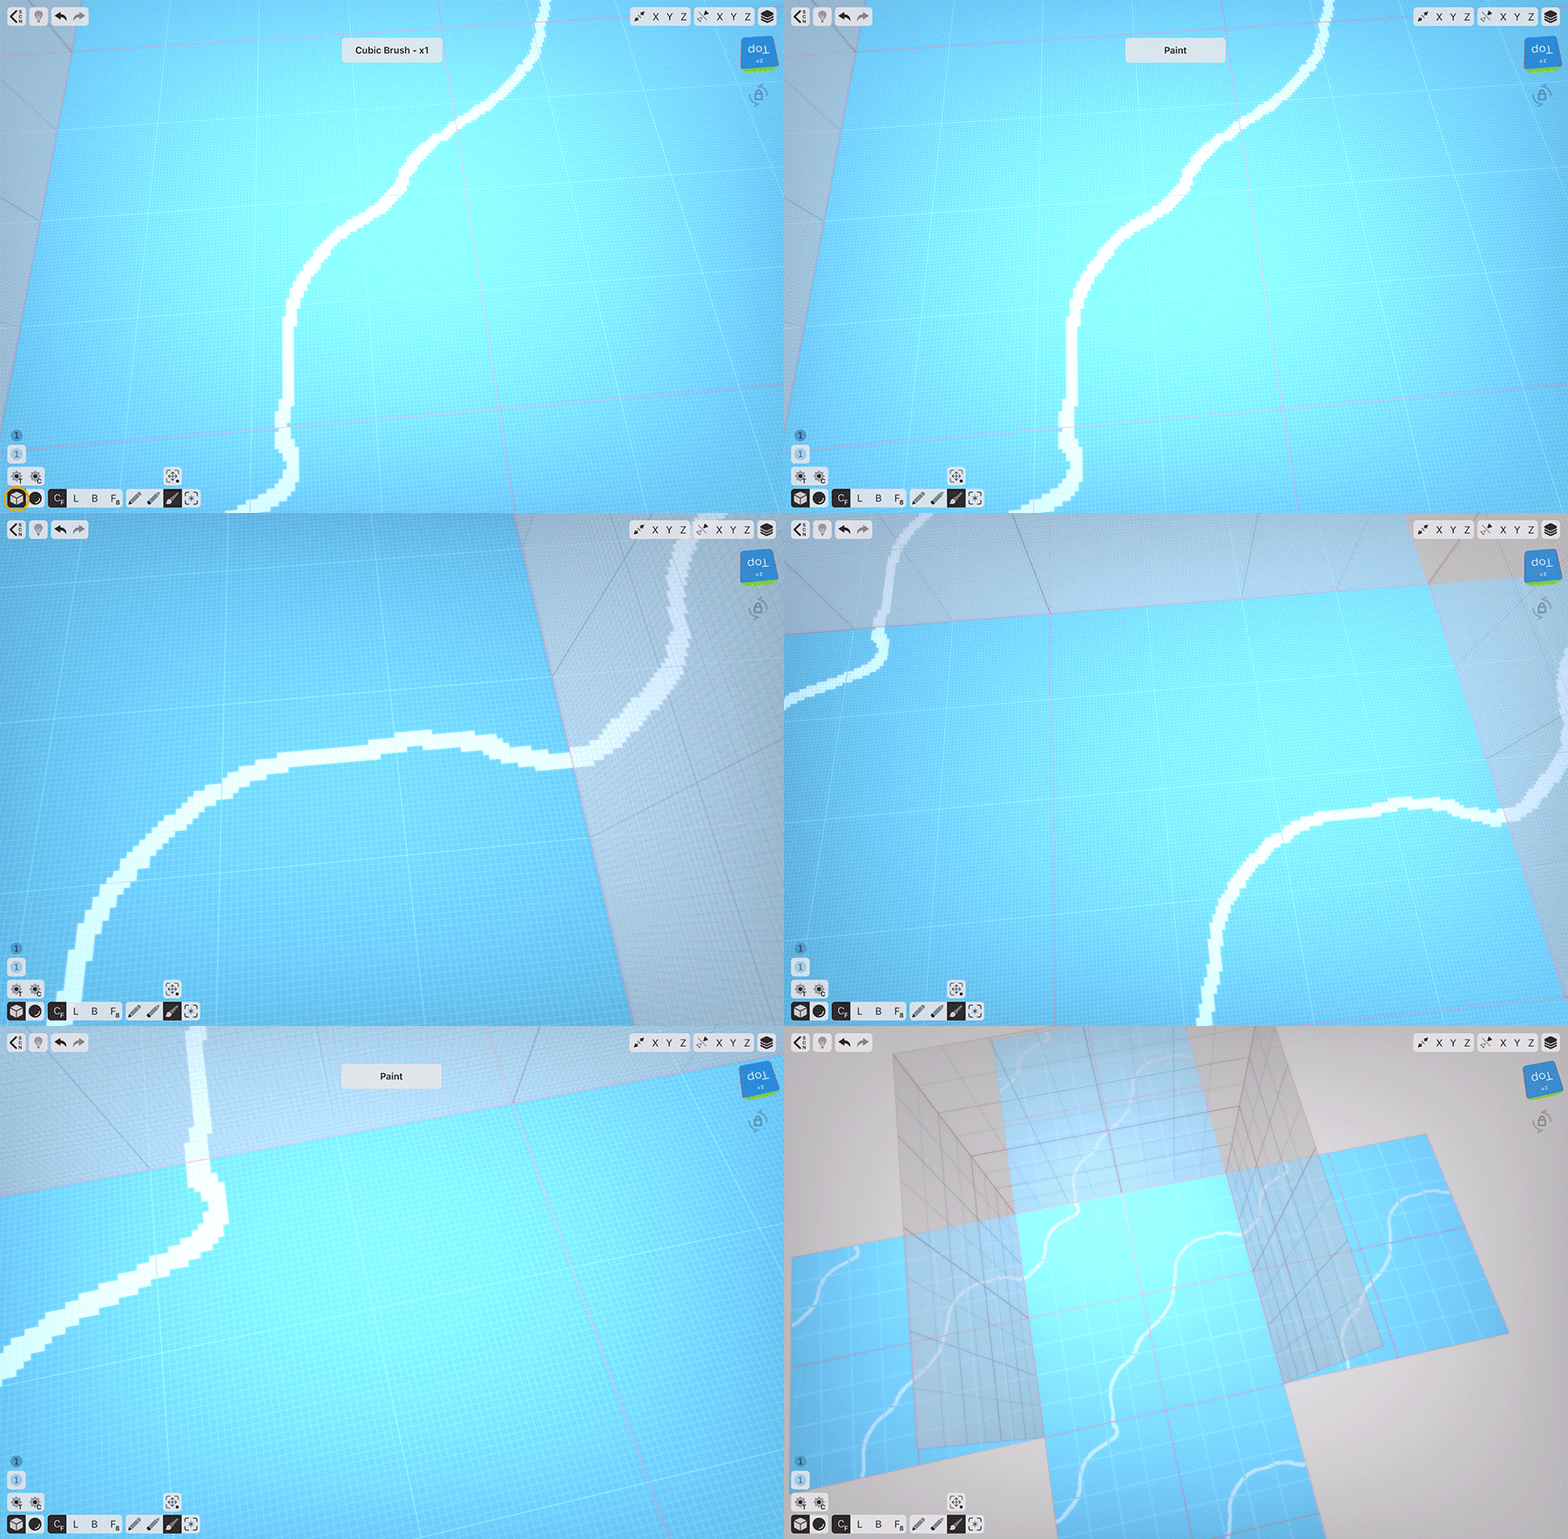
First of all, we are going to need some water. Let’s create that using Face Mode with a nice water colour.
The Pattern Base
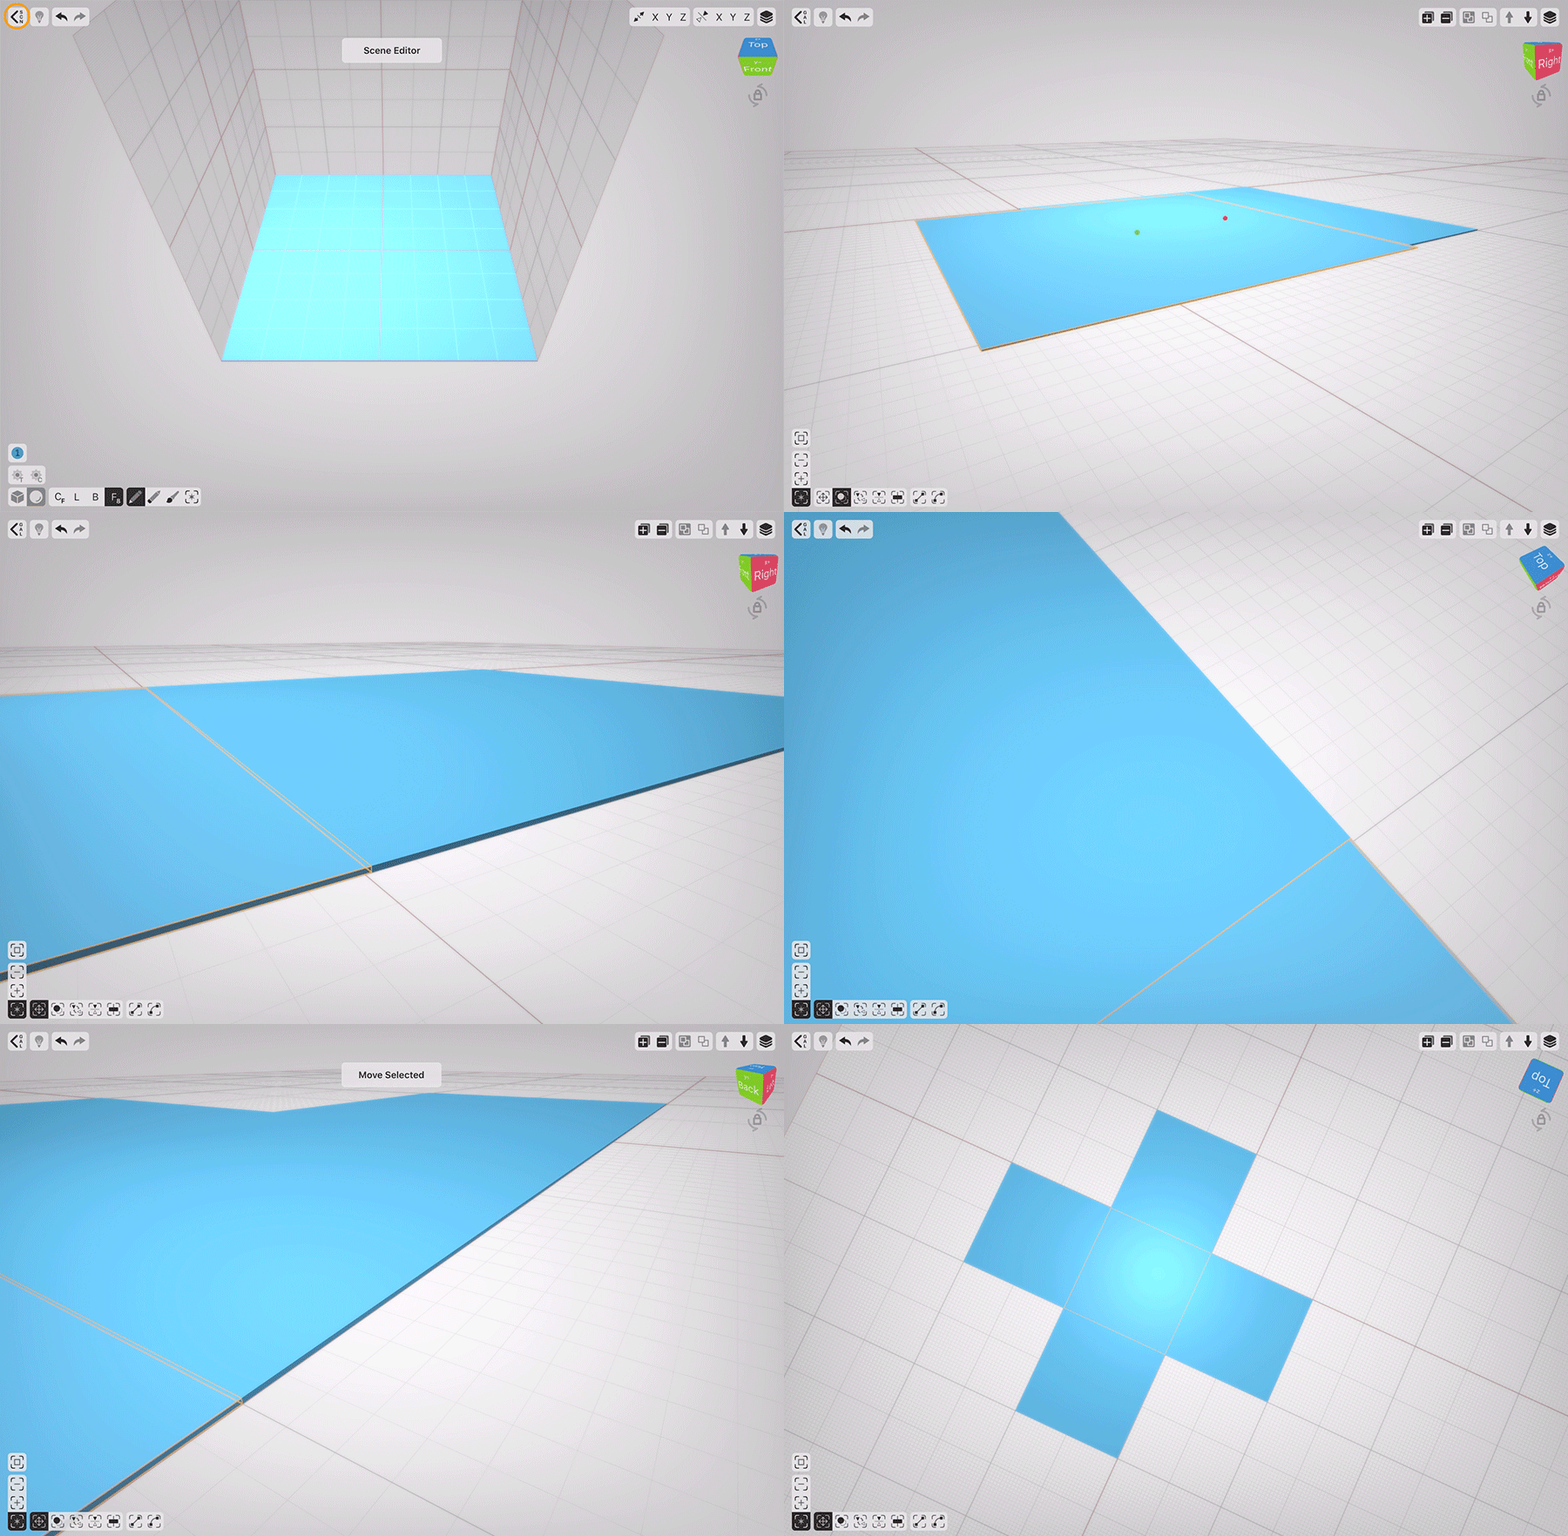
Let’s go from our Voxel Editor to Scene Editor by tapping the SCN icon in the top left corner. In VoxelMax Scene Editor, when you clone an object, it remains tied to the original object, and all the changes you make in any of the copies instantly spread to other copies as well. Because of this wonderful feature, we can easily create seamless patterns. Let’s use Clone tool and place the copies in a cross shape around our original object. Keep in mind that we are looking for a voxel-perfect precision, so let’s use Move tool to adjust our copies around our original object.
Understanding The Pattern
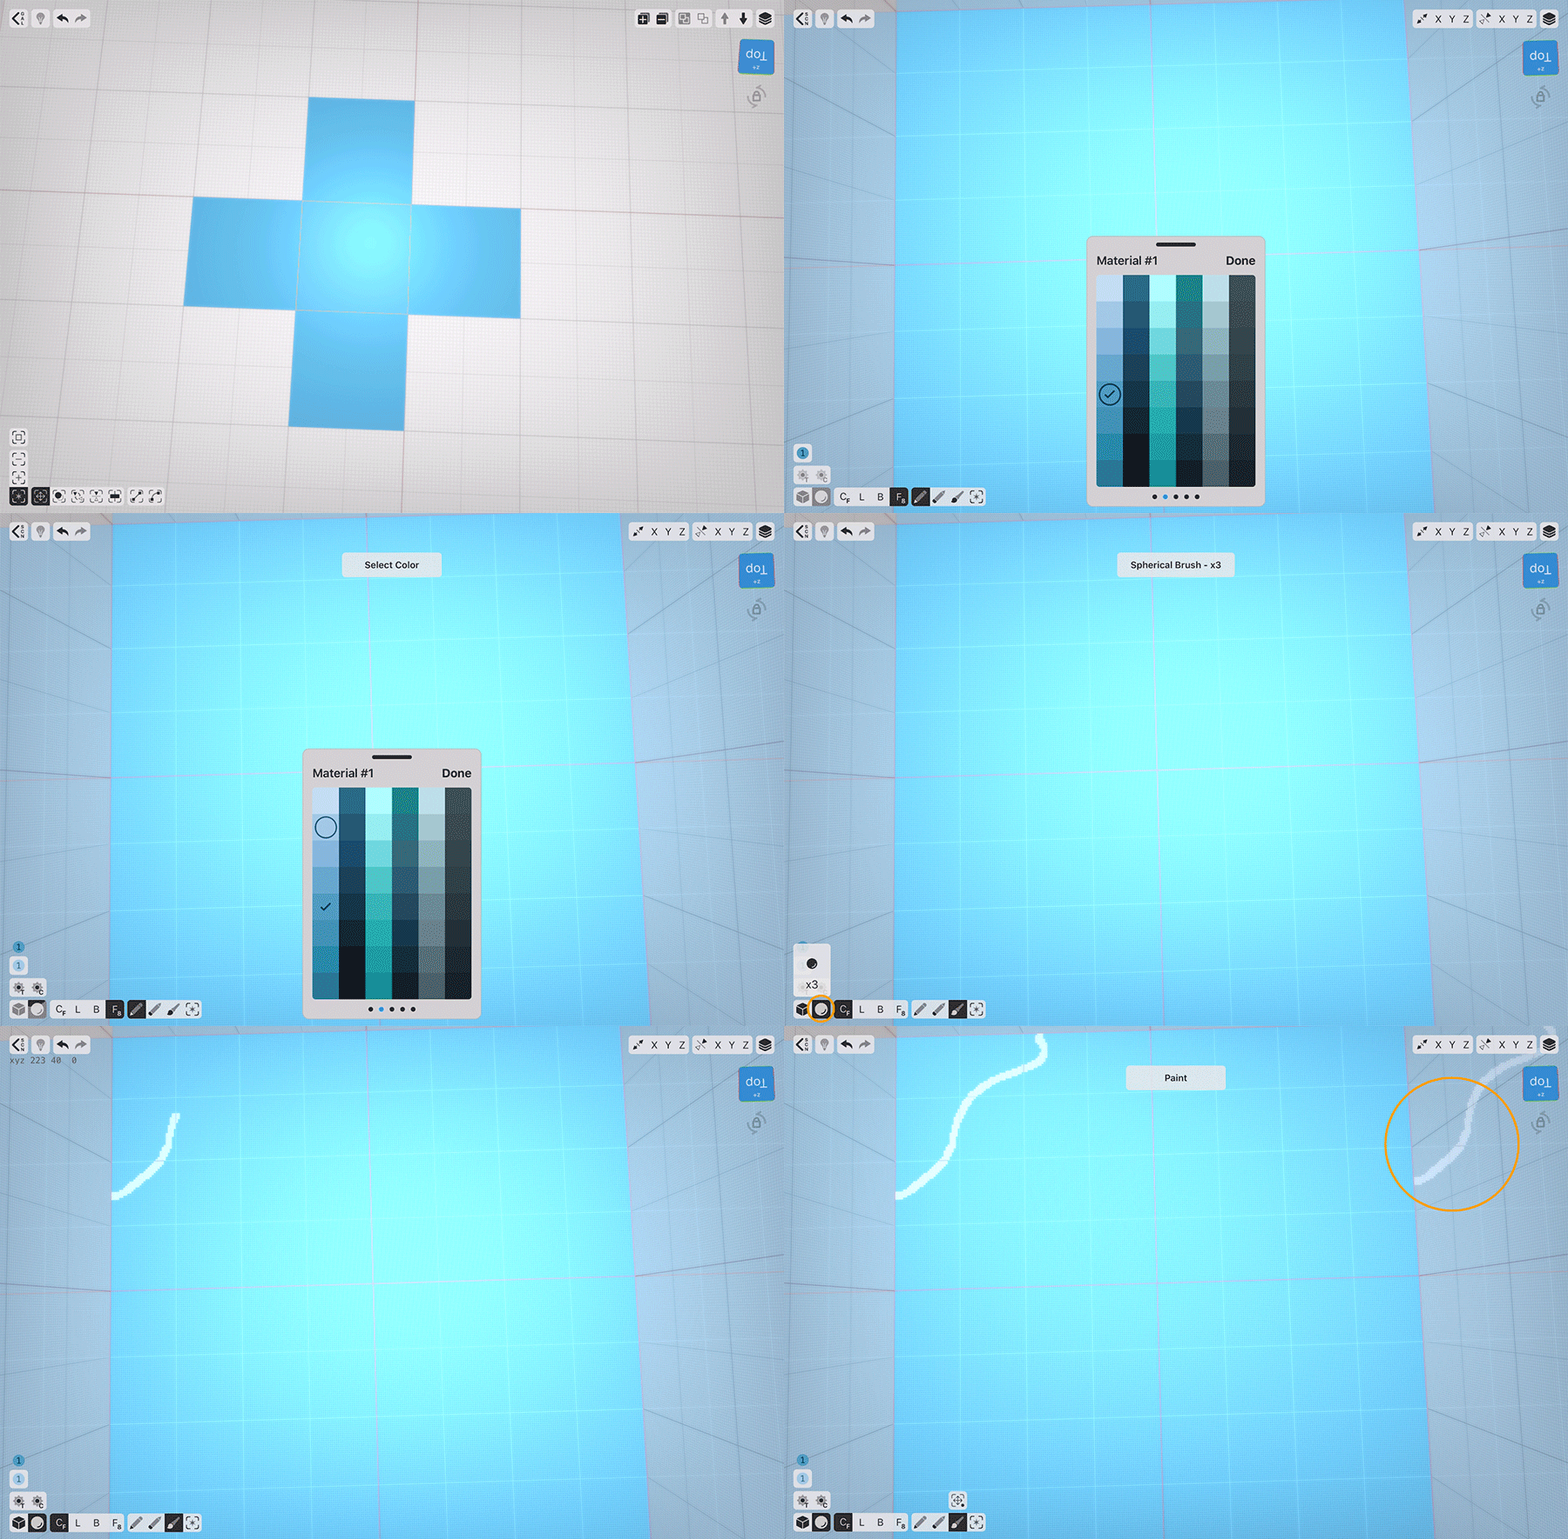
Now that we have the cross shape, we can start creating the pattern itself. Double-tap the centre (original) object to get back to Voxel Editor.
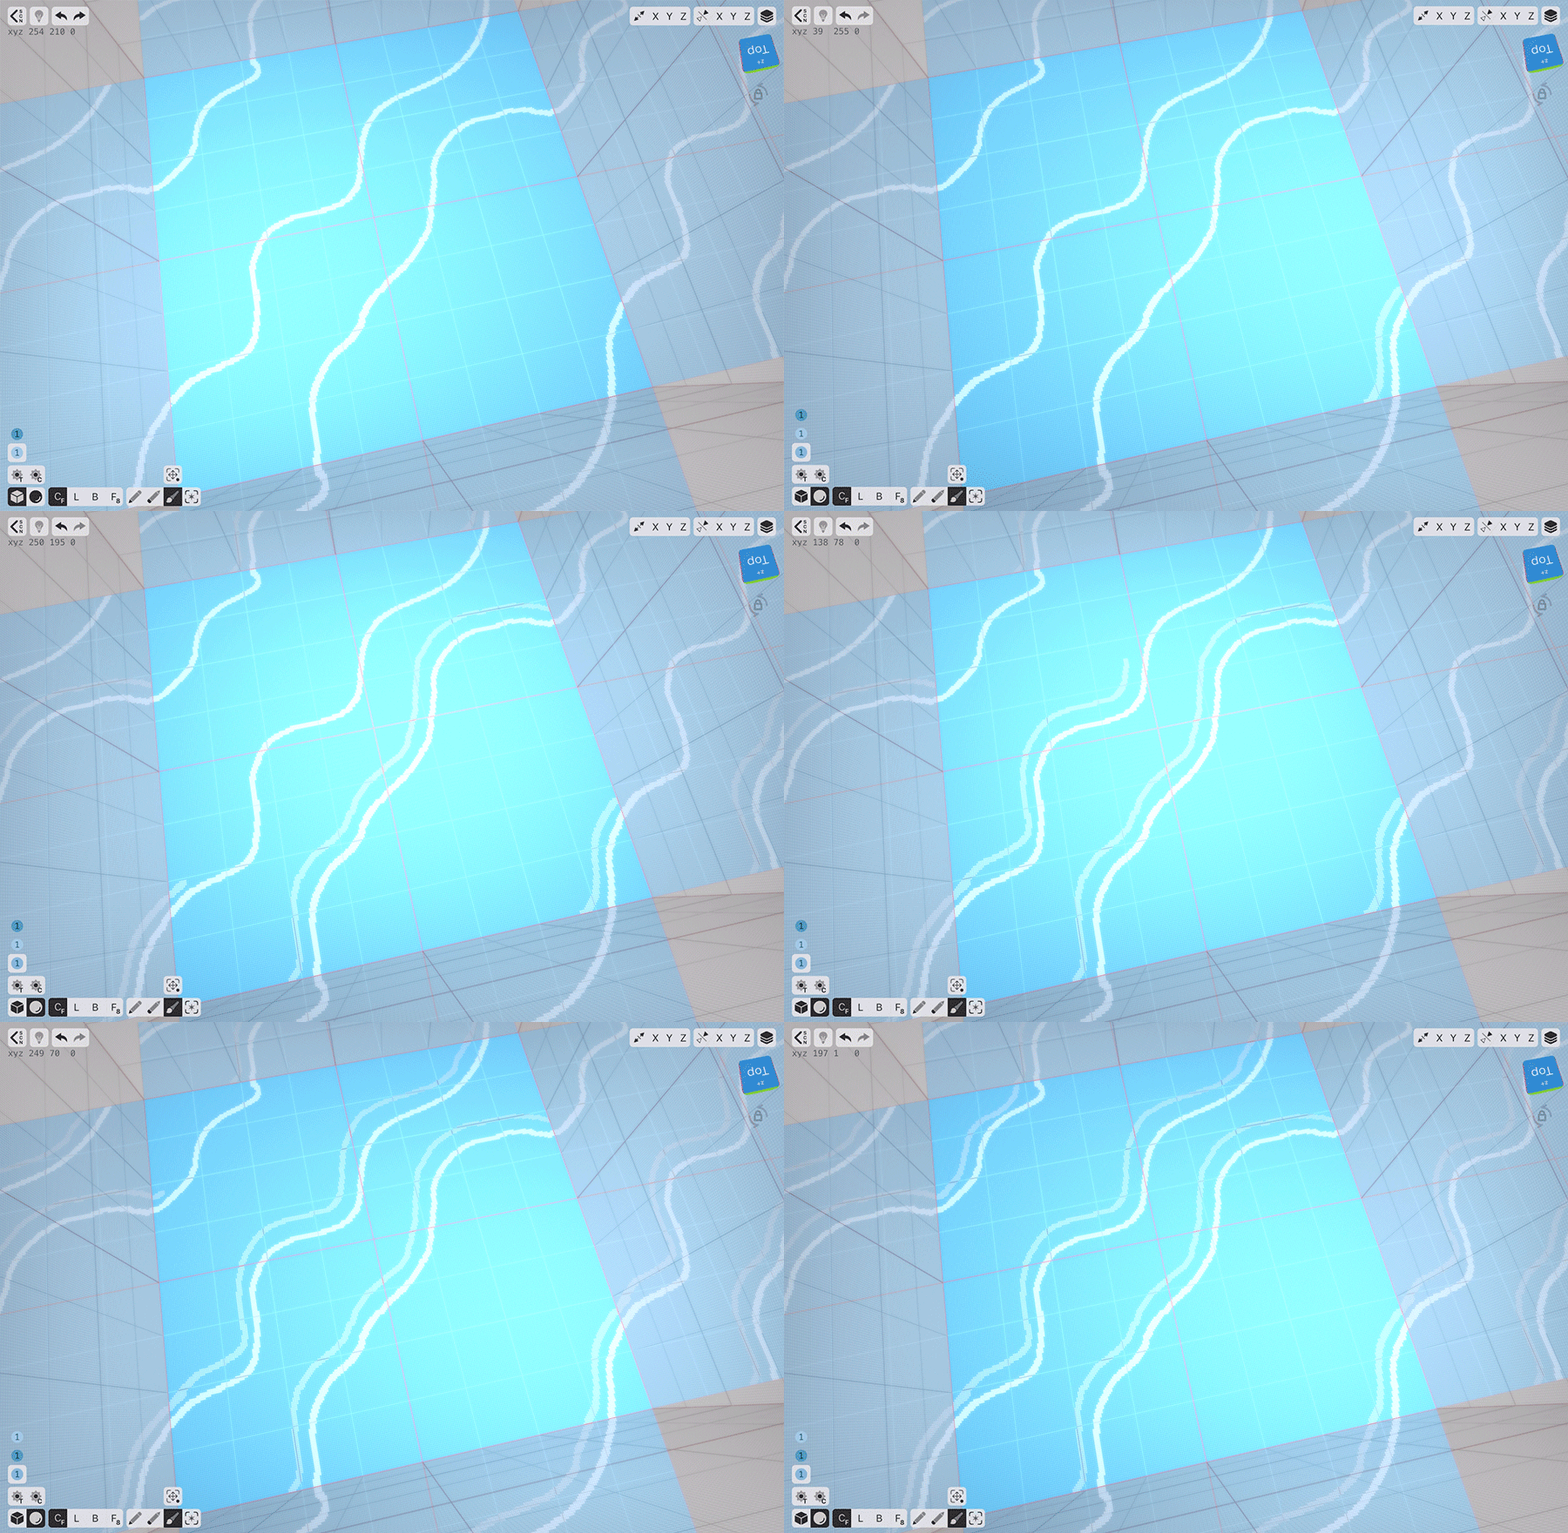
Let’s choose a colour 3 shades lighter than the one we’ve used for the water, choose the Sphere brush and set it’s size to 3 voxels and use the Paint tool in Centered Freehand Mode to draw our first wave. Notice how once you finish your brushstroke, it instantly appears in all of our 4 copies that surround our working area. That amazing feature will allow us to easily adjust our waves.
Creating Second Wave
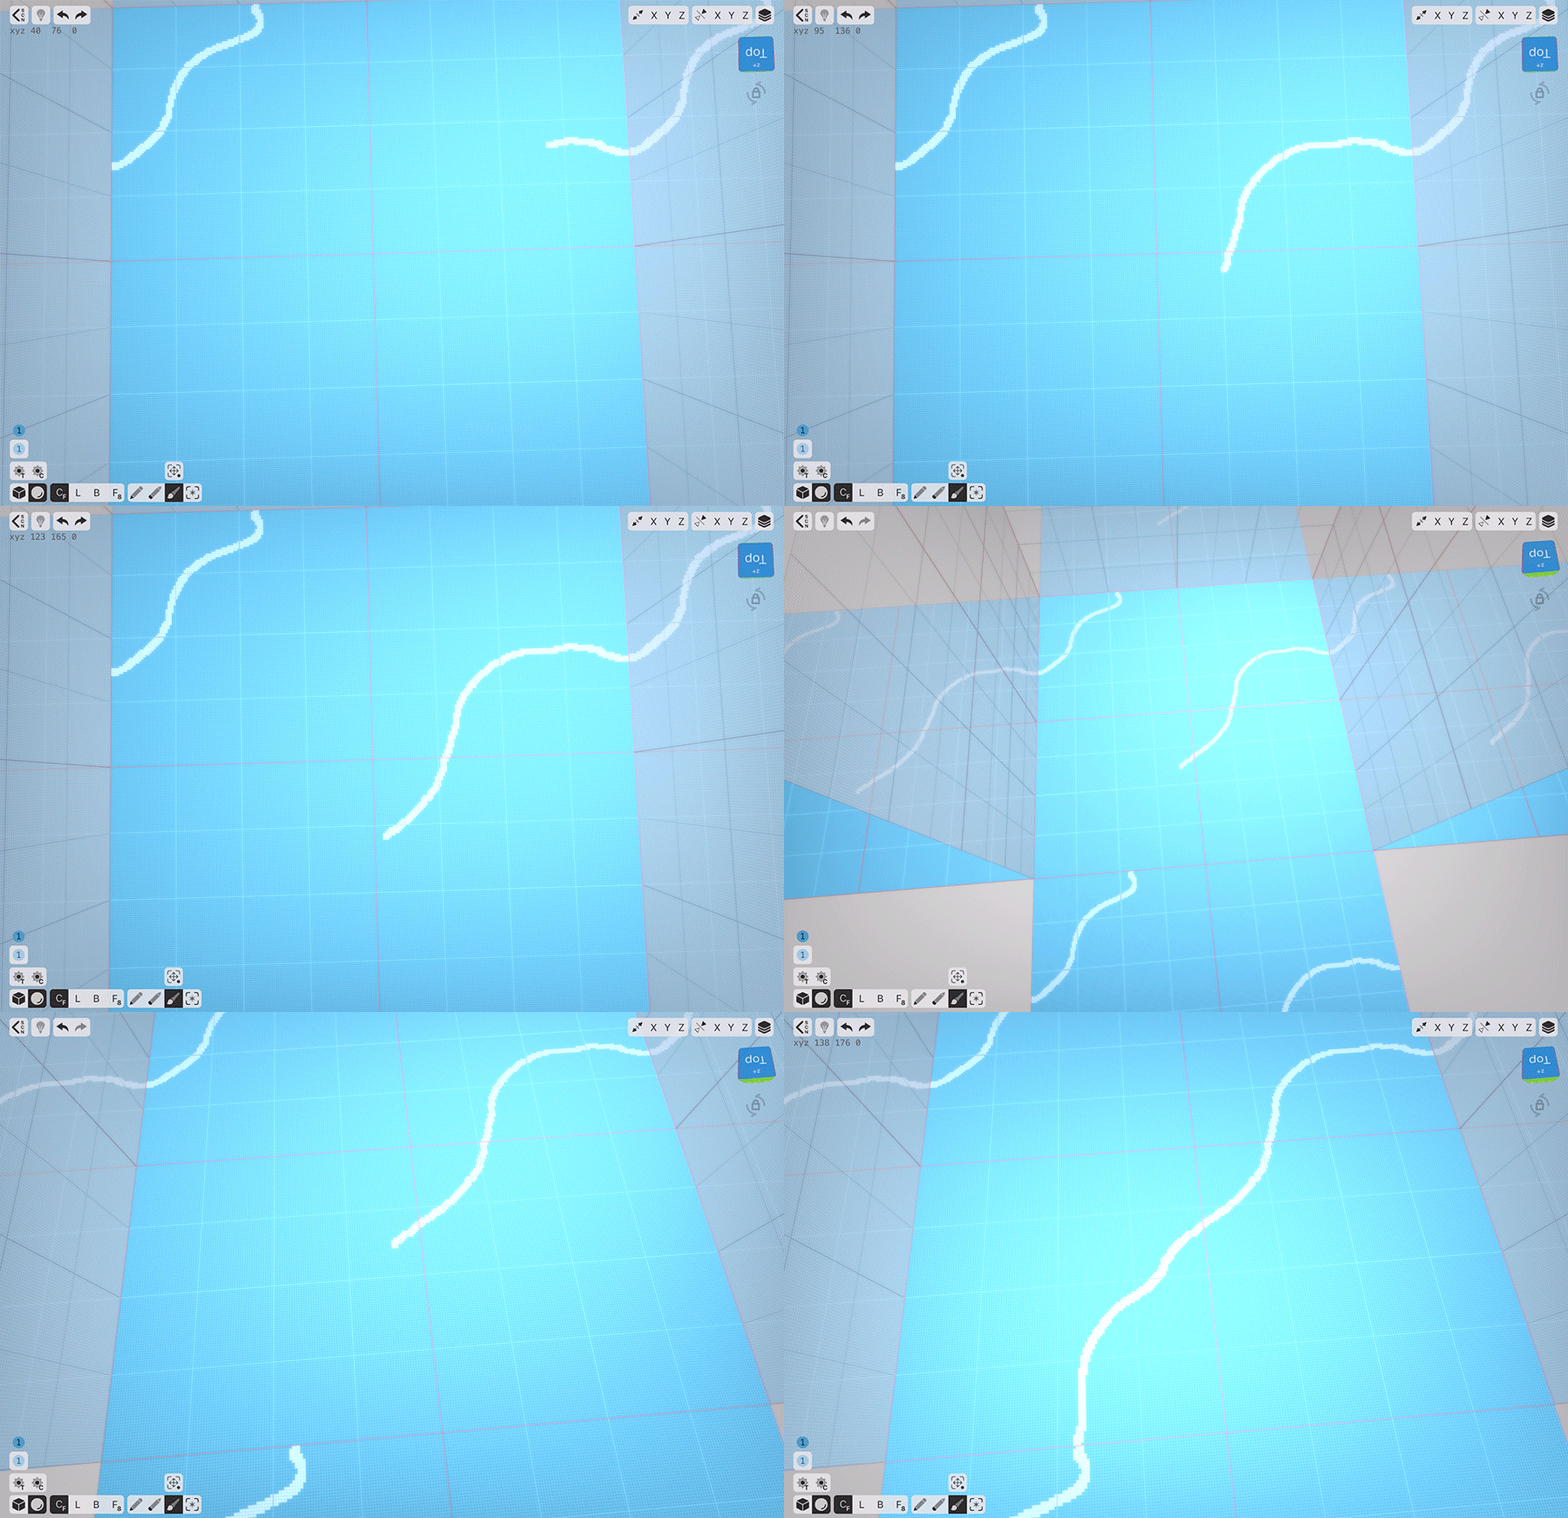
Now that we see our first wave at the edges of the surrounding planes, we can connect those edges together, creating the second wave. You can draw any shape you like. If you break the lines, your pattern will be more visible. It’s up to you to decide if you’d like to break it or not.
Fixing Small Stuff
Because of how Sphere Brush works, we are going to get a few uncoloured spots at the edges of our working area, but we’re going to easily fix this. Having two brushes is a very cool feature of VoxelMax, cause we can have 2 different sizes at the same time and quickly switch between them. In my creations, I almost. always use the Cube Brush at 1 vox size setting for everything, and the Sphere Brush at a custom size that fits my scene. So, here I’m going to switch to Cube Brush and paint over the small imperfections at the edges.
More Waves
Our scene looks like it could use some more waves, so let’s add them at our discretion.
Blending In
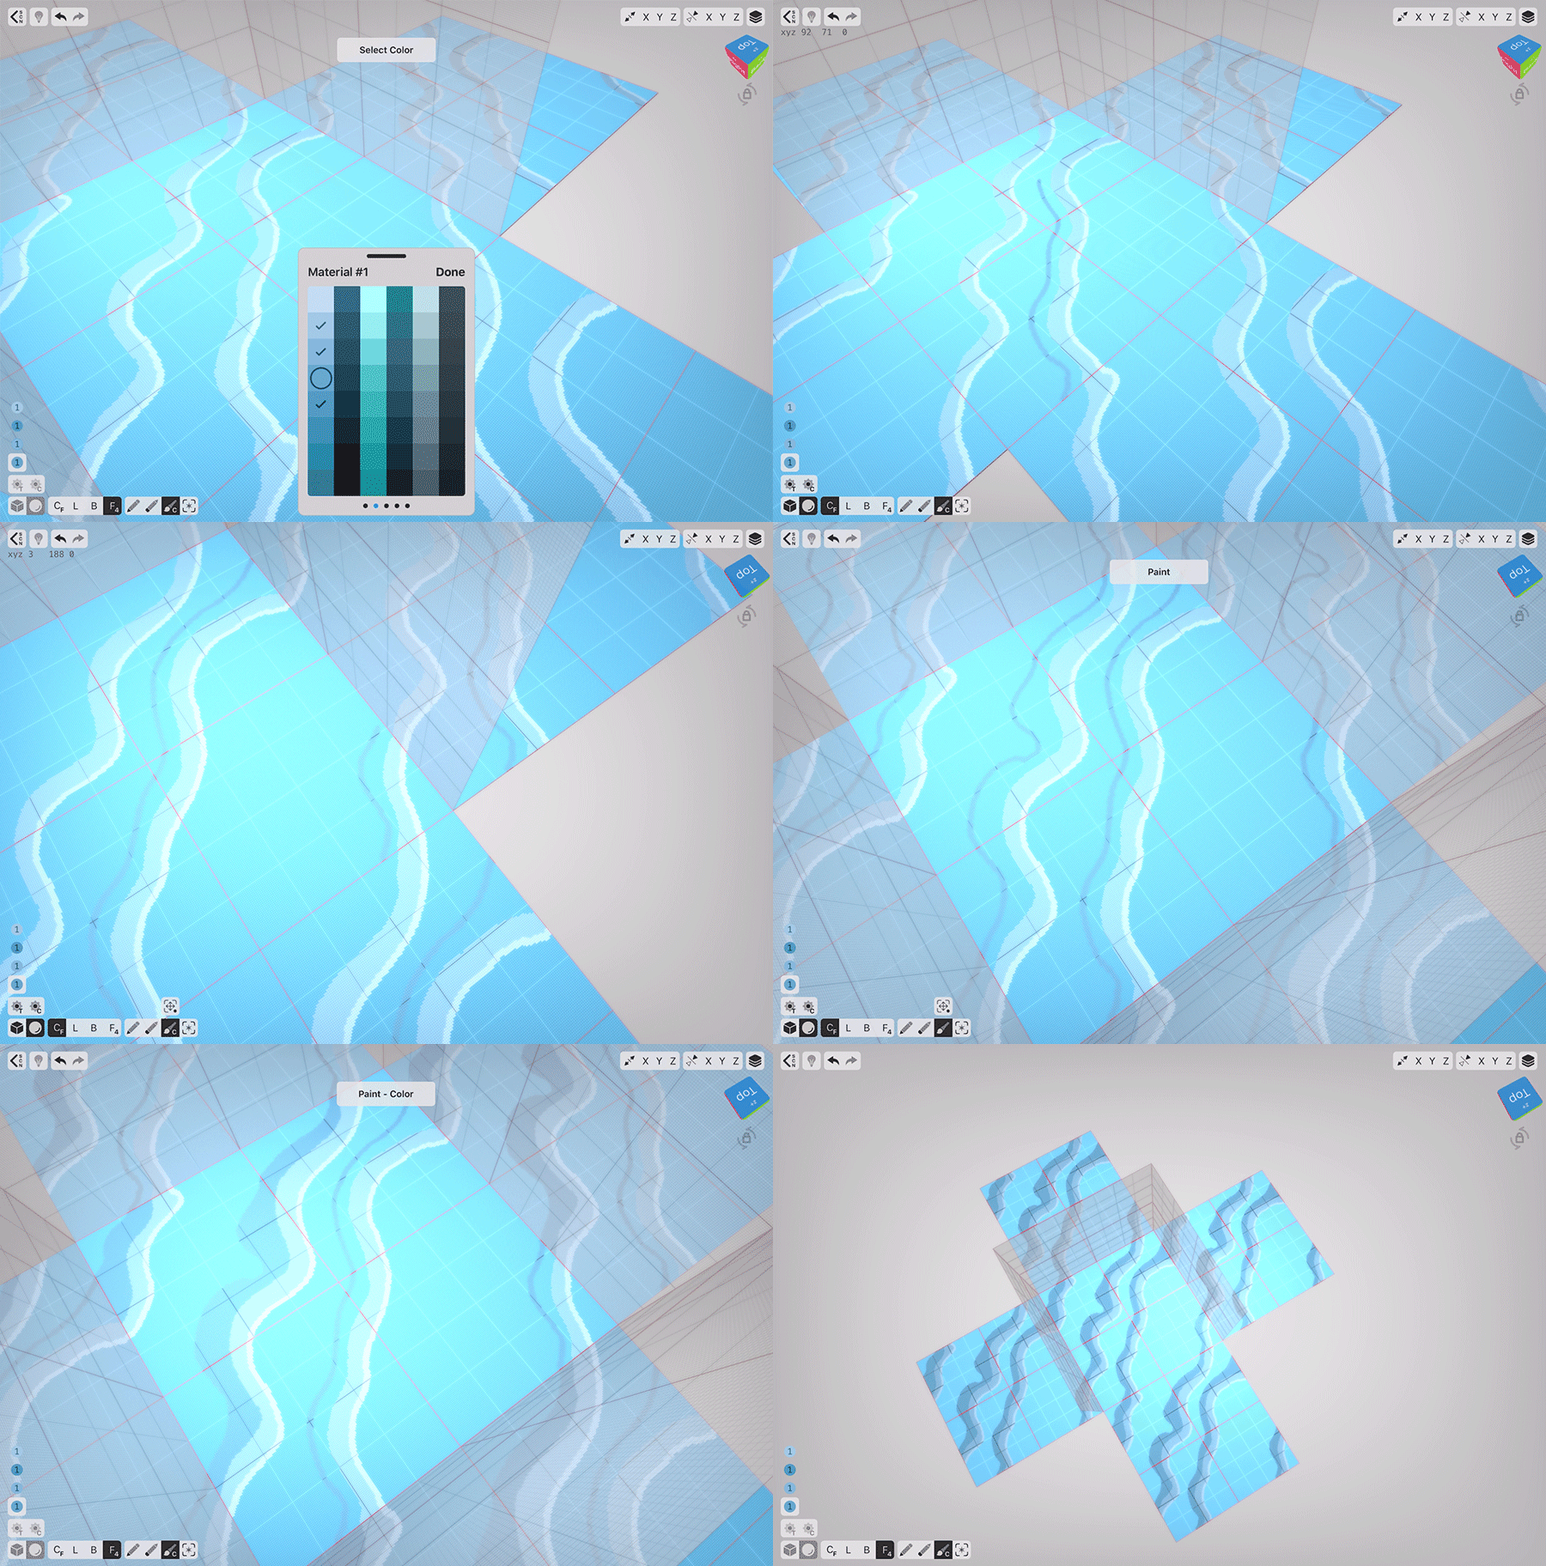
Right now things look nice, but our creation lack details. Let’s blend our waves with the water colour. To do that, choose the colour one shade darker and draw a shape next to each wave with some space between two lines.
Using Face Mode To Colour Gaps
The Face Mode in VoxelMax is very versatile. Not only can we extrude and bevel with it, we can also colour things based on either geometry or colour. To switch to the colour filling, tap the Paint tool — the small C will appear, indicating we are now going to be adjusting the colour we first tapped. Let’s tap all the smaller spaces between the lines to quickly paint them over.
Blending
What we just did already improved our scene, but let’s take things a little further and add one more colour. Let’s choose the colour one shade darker again and repeat the process for this darker shade.
Using Random Color To Blend
Another stunning feature of VoxelMax comes in handy for blending — the Random Color tool. Basically what it does is adding a second (lower) colour to the selected colour as you paint (or create) at a random rate within your brushstroke. This is perfect for blending two colours together or for quick texturing. Let’s make our brush size a bit bigger, say 7 vox, and quickly follow our coloured lines with brushstrokes with Random Color on, always choosing the lighter colour of the two we want to blend.
Adding A Smaller Wave
Our scene already looks great as it is, but I think it would benefit if we add a small accent wave. I’m going to use the same technique I used before.
Expanding The Water
Our pattern is now done, so we can go back to the Scene Editor and clone some more objects to make our water even. It’s completely up to you at this point how many objects you wish to copy — just think of how big your scene is going to be. Also, you can always clone some more tiles when you need them.

