Intro
When creating small models, it’s important to keep in mind that we need to enhance what’s important and make creative decisions when it comes to choosing our next step: should we add voxels here or just paint them to showcase some feature? How much texturing does this model need? Hopefully this tutorial will help you to make those choices both for this particular model and any other low-scale models you’ll create later on.
Creating The Trunk
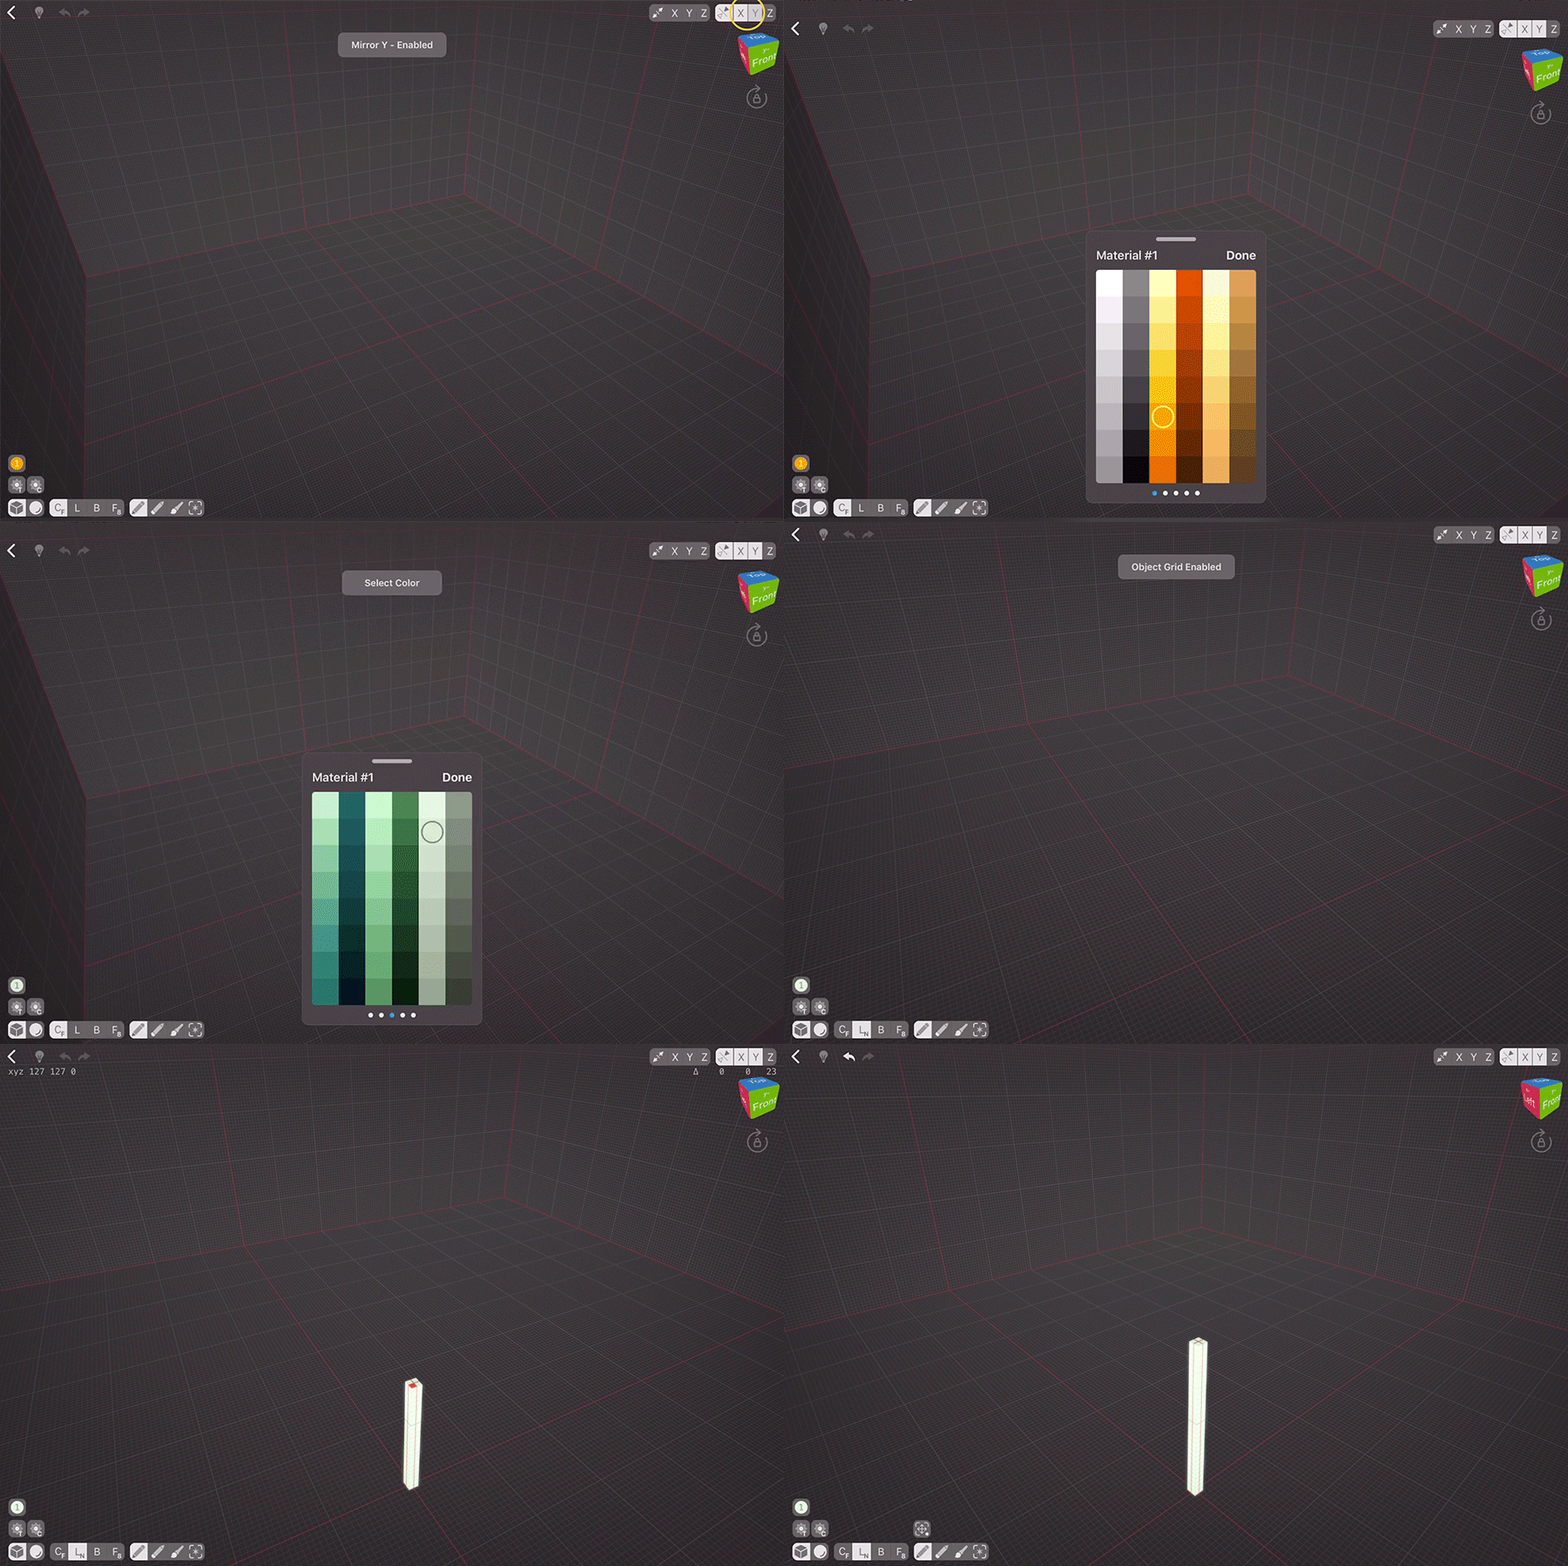
First of all, we need a starting point. Let’s enable Mirroring on X and Y axes to save us time, reduce the brush size to 1 voxel, select a very light shade of green (cause despite looking white, close-up birches have some sort of colour to them, mostly it’s either green or brown tint), and choose the Linear Normal Mode. This mode creates (erases, paints, selects) a line of voxels that stands out from the tapped voxel face, so it’s perfect for trees, columns, legs and such. As mirroring works around the scene centre, we are going to tap the voxel that’s right next to the intersection of the red lines — they mark the mirroring axes. Let’s make it about 32 voxels tall. The fuller grid in VoxelMax is 16 voxels wide, so we need it to be approximately two units. As you can see in the GIF, I pass the second fuller grid line and then go back to keep our trunk smaller than 32 vox tall.
I almost always use 1 vox sized Cubic brush for most of my creative process when working on low-scale creations as it gives me more control over things.
Creating First Branches
Let’s start creating branches from the top as this way we’ll have more control of what’s going on with our tree. There are several ways to make the branches, and I’m going to show you both.
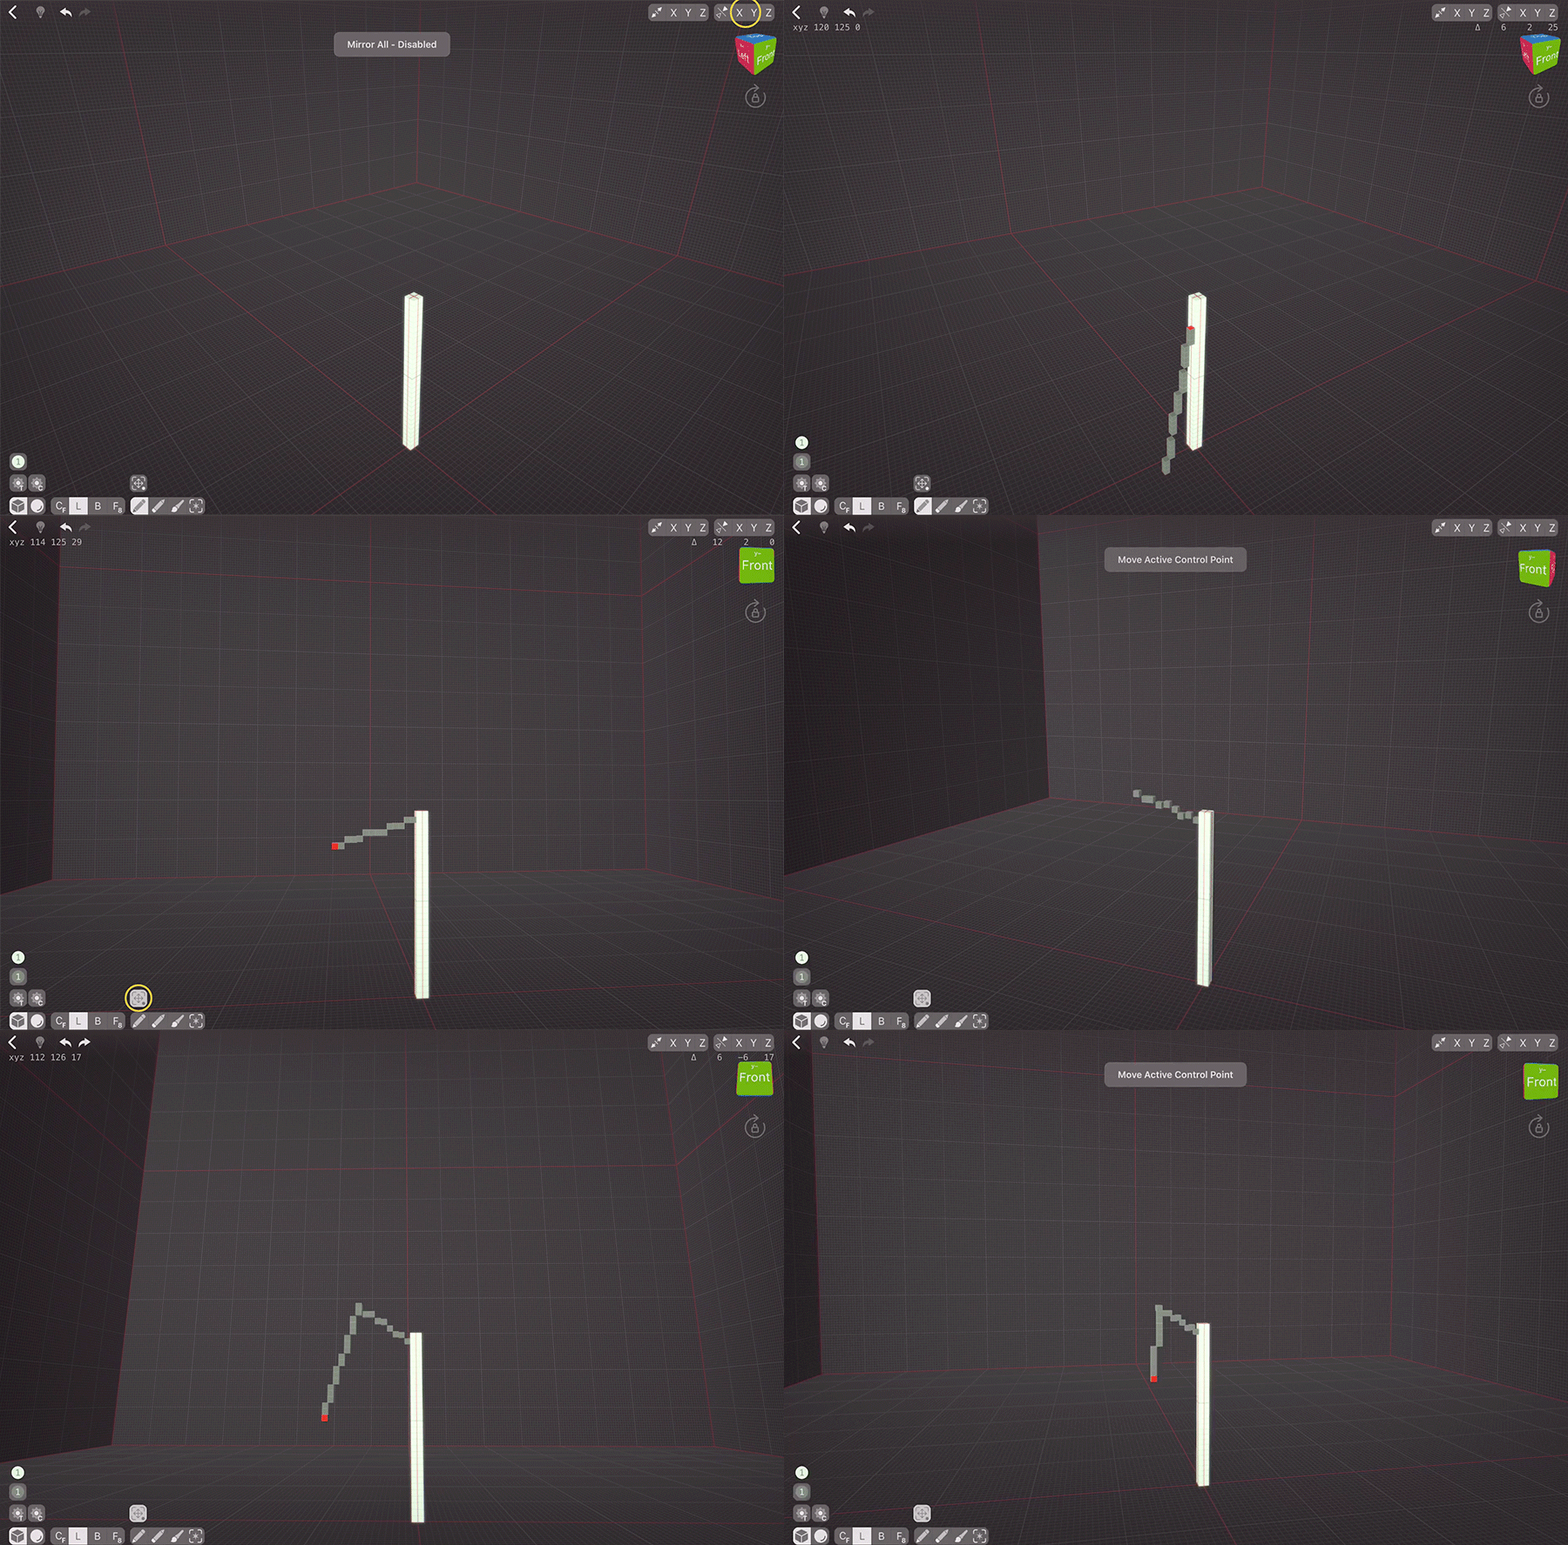
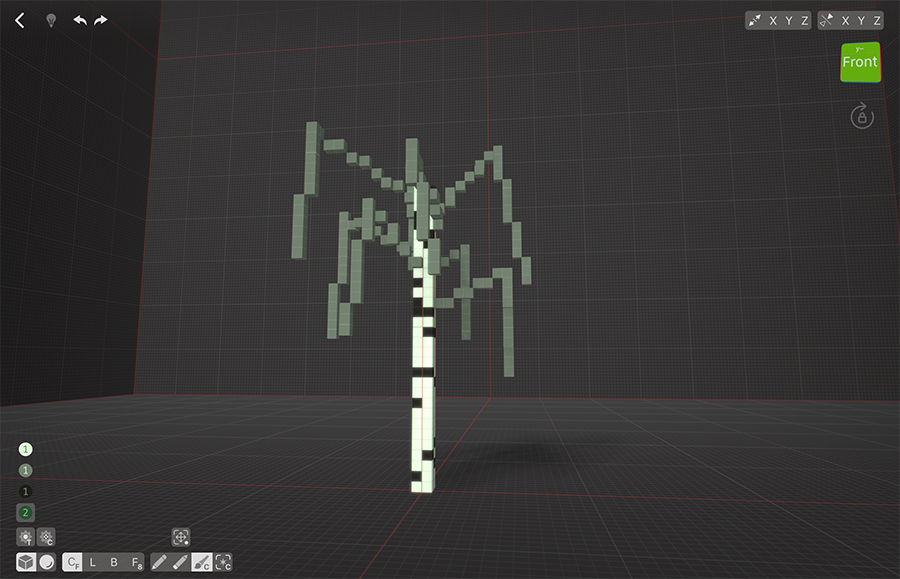
Let’s choose a darker shade cause birch branches tend to be sort of greyish, turn off the Mirroring, and use Linear Mode. Tap the ground and then connect it to the trunk. Next, we’re going to use an amazing and unique tool called Adjust Last Action. Here, we’re going to use Move Active Control Point to adjust our branch. The birch we’re making is going to be a weeping one, so we have to create some strands that do downwards as well. Let’s create another line and then adjust it.
For the next branches, let’s repeat the whole process, making sure we’re leaving enough space between branches.
Another Layer of Branches
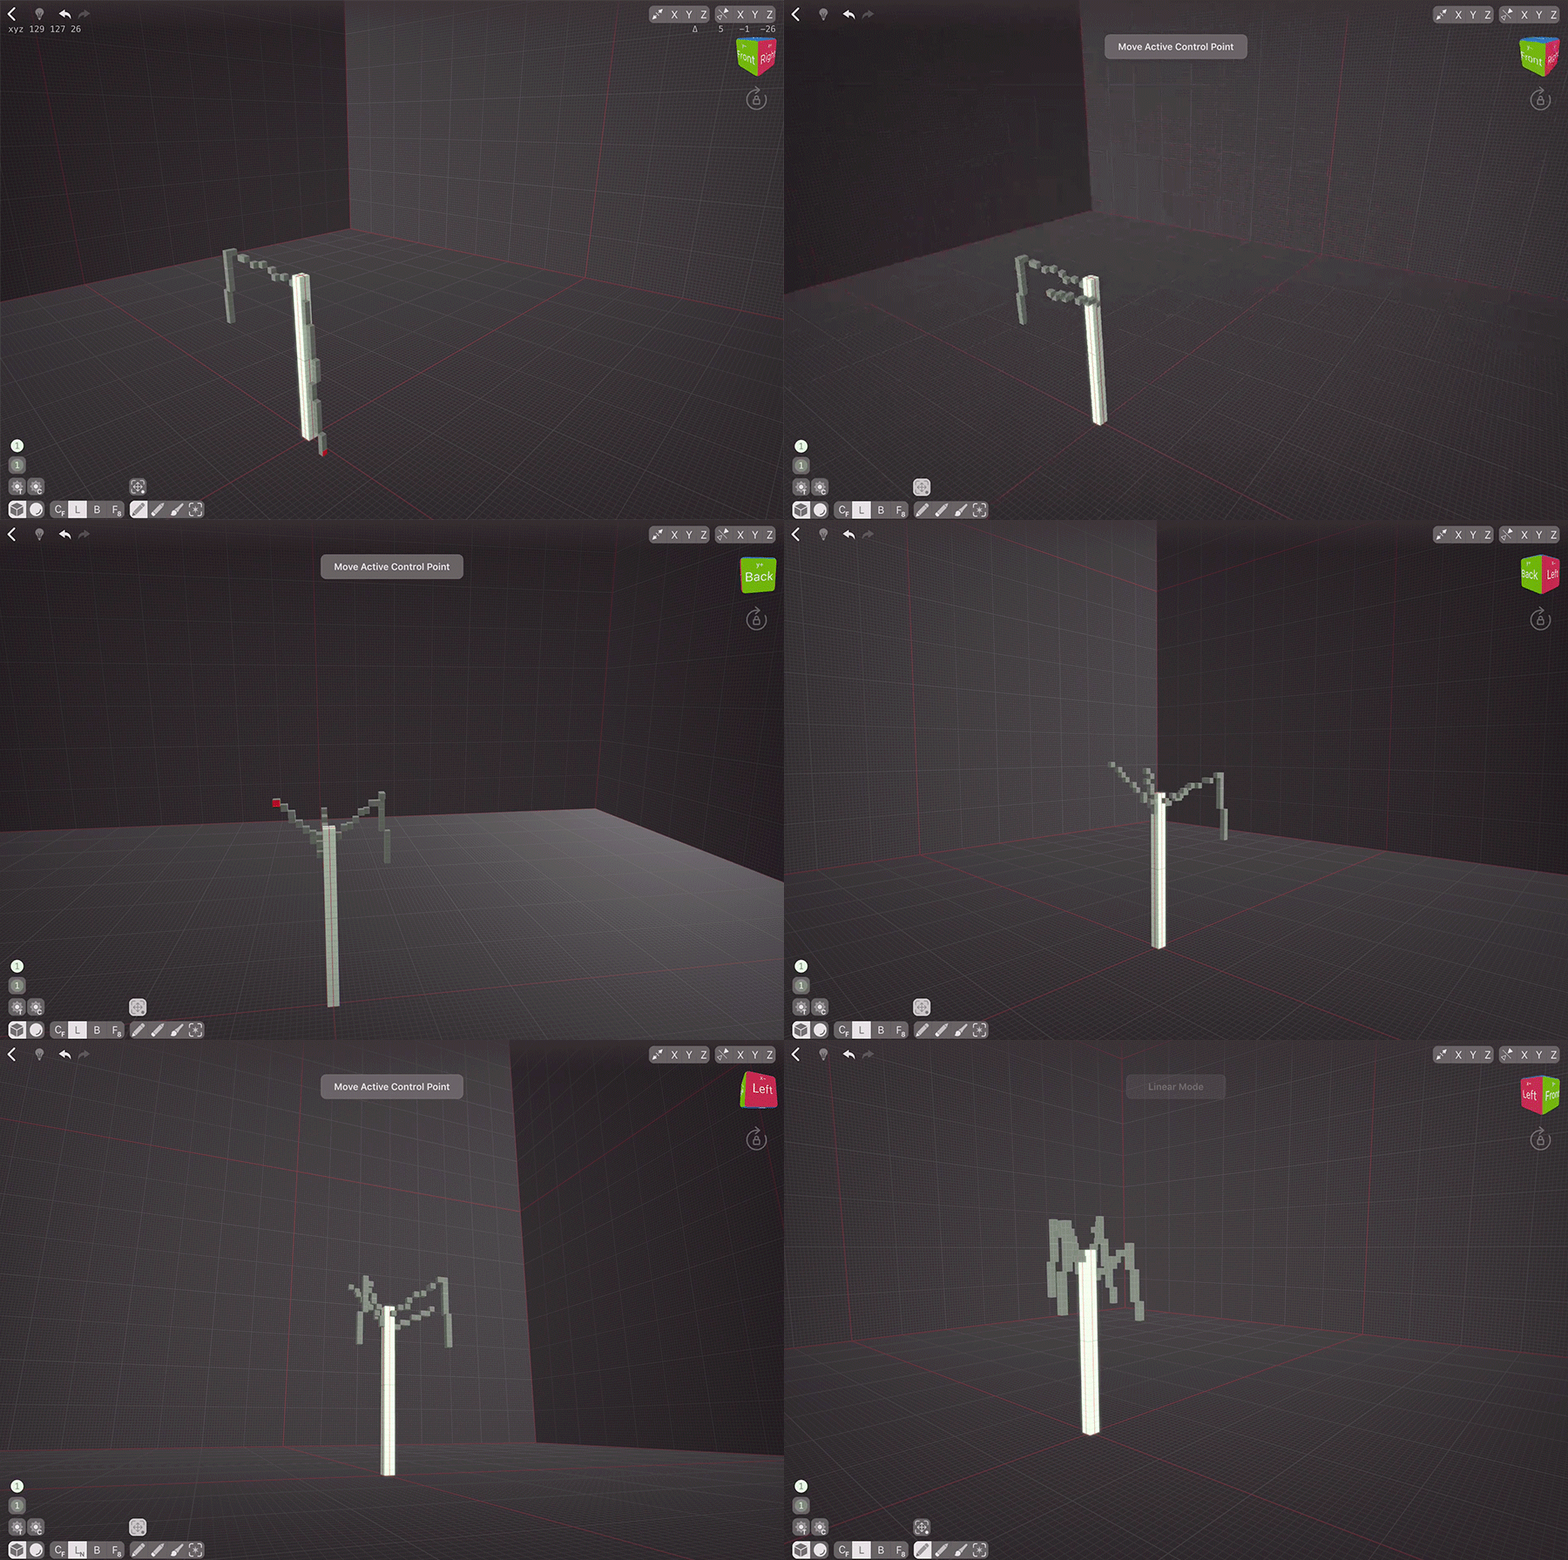
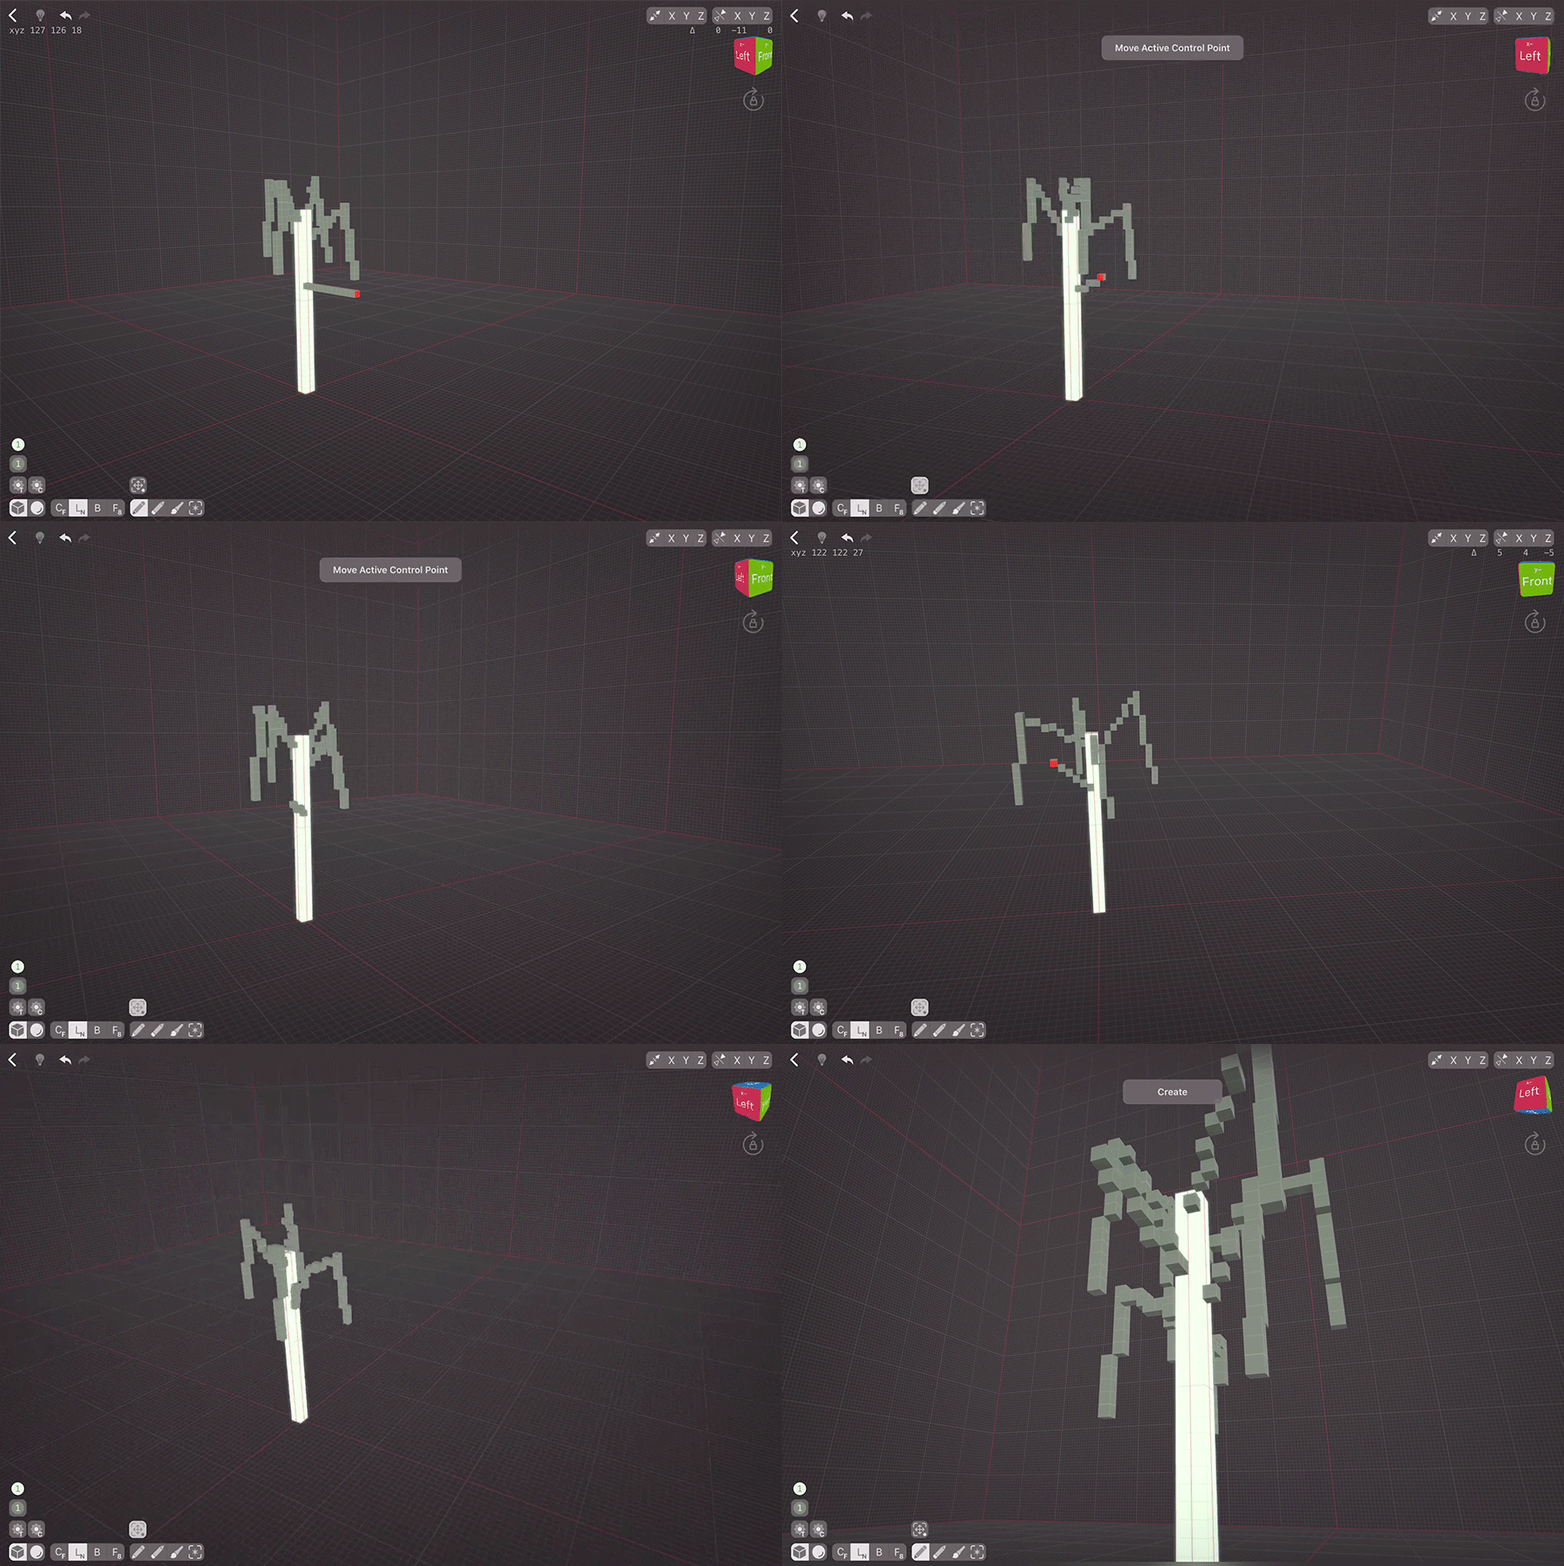
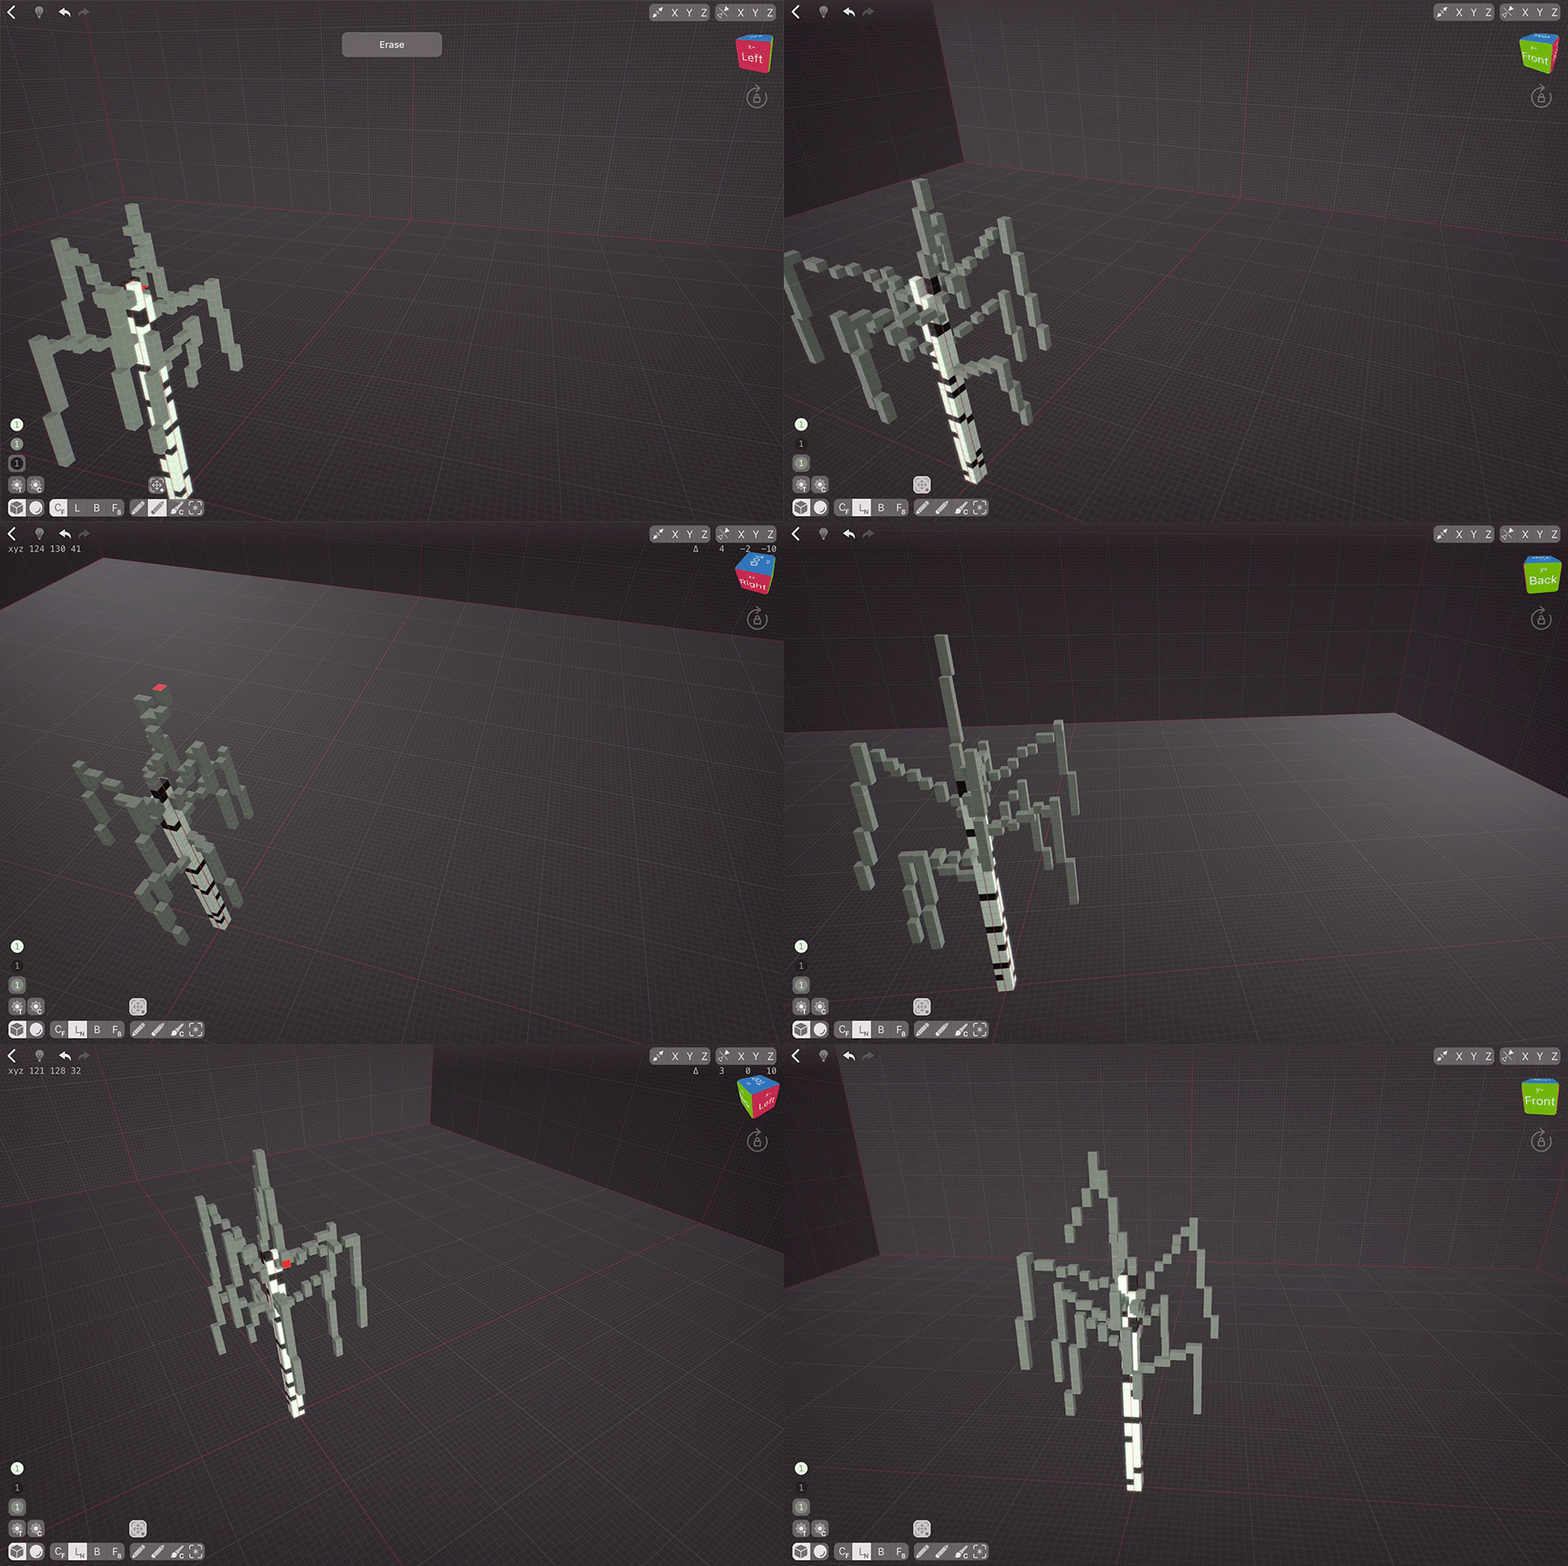
As we continue to grow our tree, we need to make sure that the branches are not forming any sort of predictable pattern, cause nature doesn’t really create perfectly symmetrical birches. As I mentioned before, ti create branches you can either use the method we used before, or you could use Linear Normal Mode. Tap the trunk and drag, then Move Active Control Point of the branch to make it look more natural.
Painting The Trunk
We are now done with the principal branch modelling, so we can paint the trunk. While it might seem natural to go for pure white for the trunk body and pure black for the stripes, both pure white and pure black rarely occur in living things, trees included. So let’s use a very dark shade which is not pure black. We can use Paint Color Tool to only colour the trunk. With the Colour option, only the same colour as initially tapped will be affected — so we can not worry about accidentally hitting the branches. Let’s just draw some stripes, but keep in mind that we don’t want to make them plain straight lines, or they’ll look a bit basic. Let’s give it some texture by painting more than one line of voxels here and there.
Top Branch
Let’s make another branch directly on top using the same process as we did before. We can also trim the trunk a bit. Looks like we’re done with creating branches for the tree!
Adding The Foliage
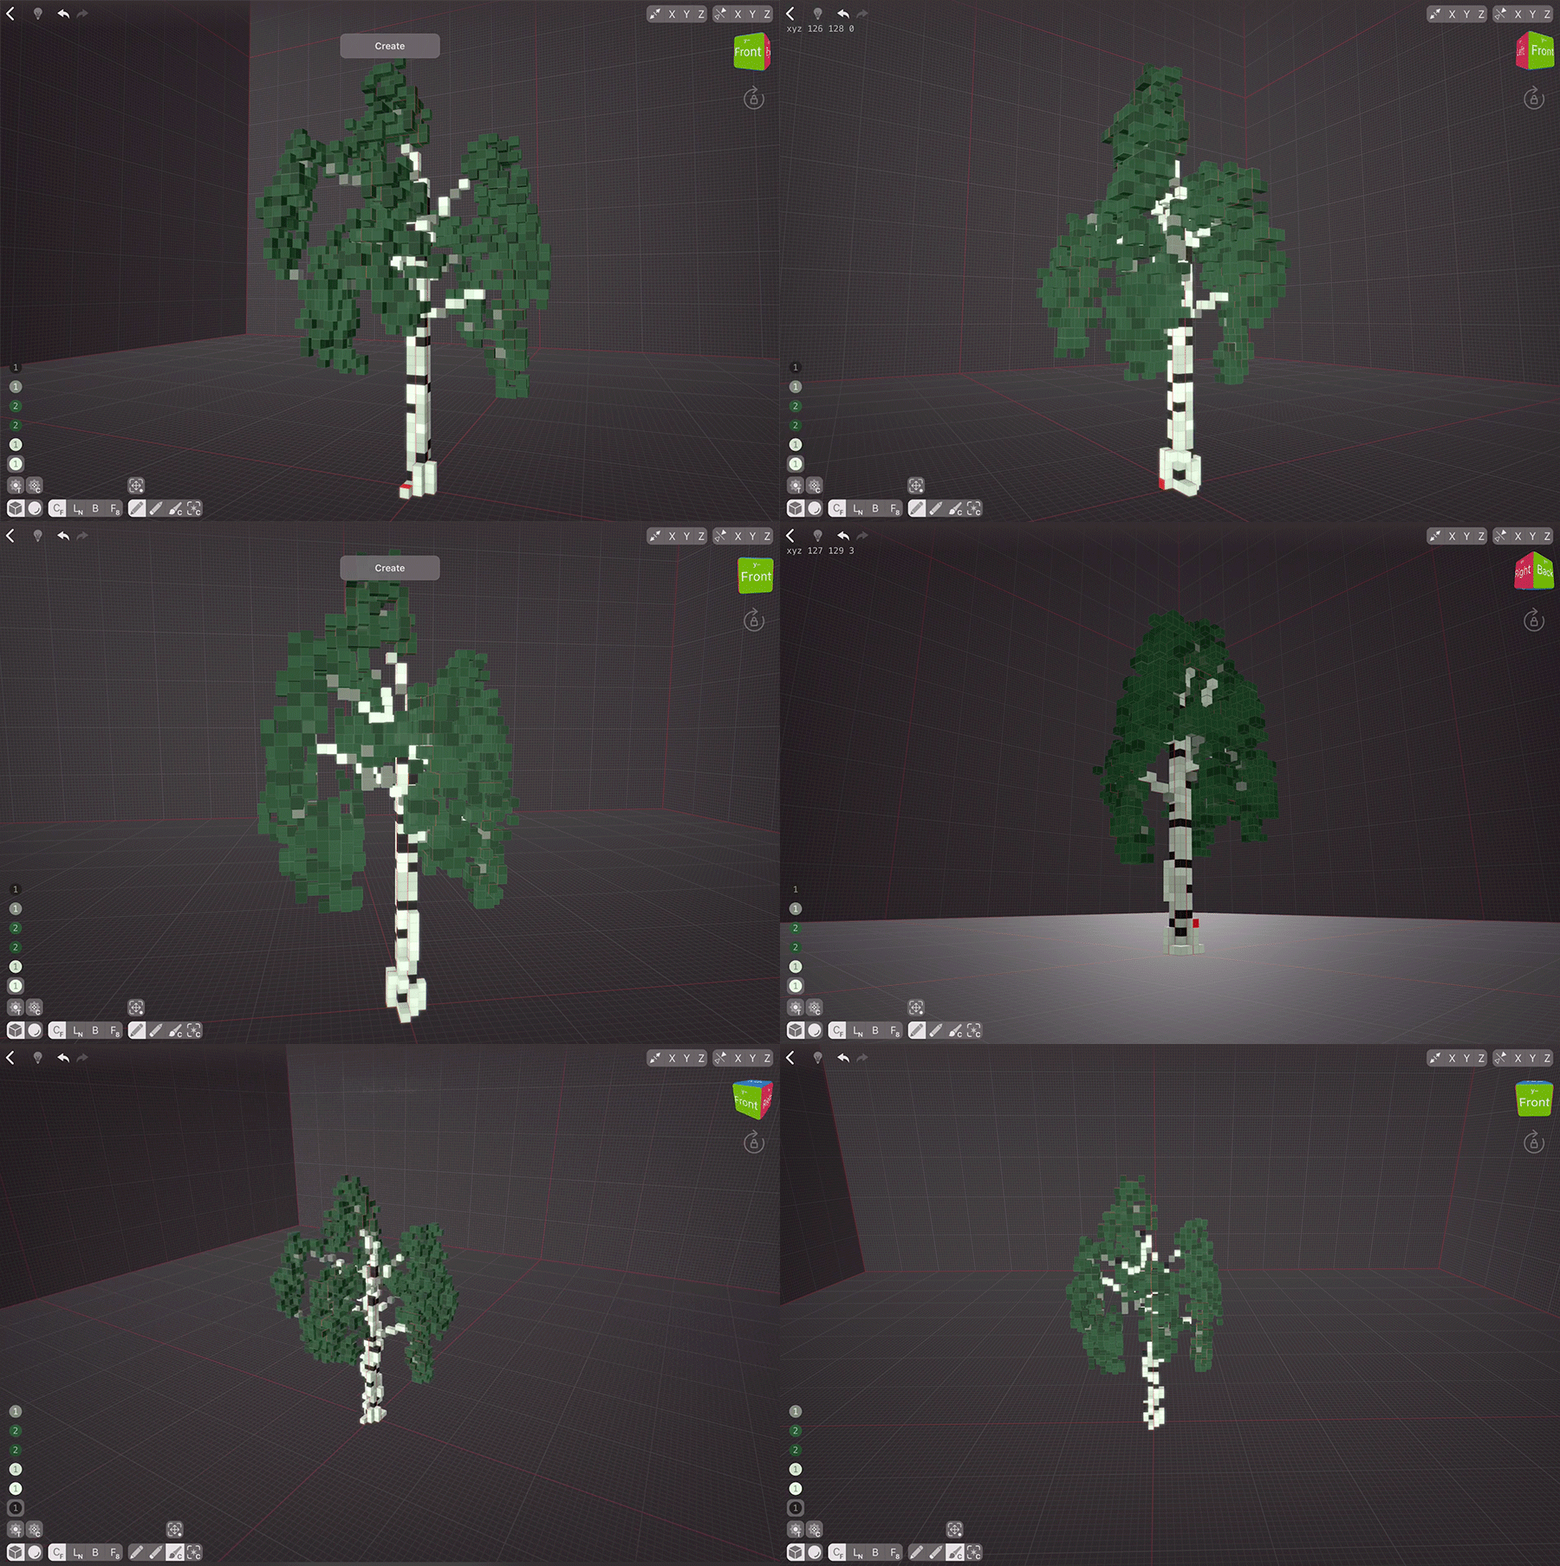
Let’s create some leaves! To do that, we need to switch to another Material, cause we’re going to adjust the materials, so it’s better to have them on separate layers. We also need to turn on Random Brush Texture and Color options so we don’t have to work as hard. Great, now let’s choose a medium green shade and let’s start adding leaves. Be careful to only touch the branches, cause otherwise your leaves will connect to the ground and form a long line :) If that happens, simply undo that and repeat the process. Randomly add foliage to the branches that are going downwards. Then add some more on the sides to make it interesting.
Trimming The Foliage
Right now our leaves look way too dense. Let’s trim them in a quick and easy way. Set your Selection Tool to Select Color and choose one of the used greens. Then go and choose Select Material from the Selection drop-down menu. The palette colour should get selected. Switch to the Erase Tool and choose Selected from the drop-down menu. Voila, our tree is trimmed. But we have deleted one of the colours, so let’s use Paint Tool to texture the leaves again. Once done, we can also texture the trunk a bit with a light shade.
Texturing The Trunk
I think our trunk could also use some texture to show the peeling bark. Let’s choose a lighter colour so our randomised brush won’t use colours of other shades, and quickly paint the trunk as well.
The Secret of Nice Foliage
One of the tips to make foliage look good is to slightly reduce opacity to say 93-98%. Let’s do that for our tree. Looks good!
Adding Volume To The Trunk
Now, let’s add some voxels to the trunk to make it more interesting. Not a lot, cause birches are generally straight, but some to make it look better. Don’t forget to turn off the Random Brush Texture, cause otherwise you’ll be adding too many voxels at once.
Finished Creation
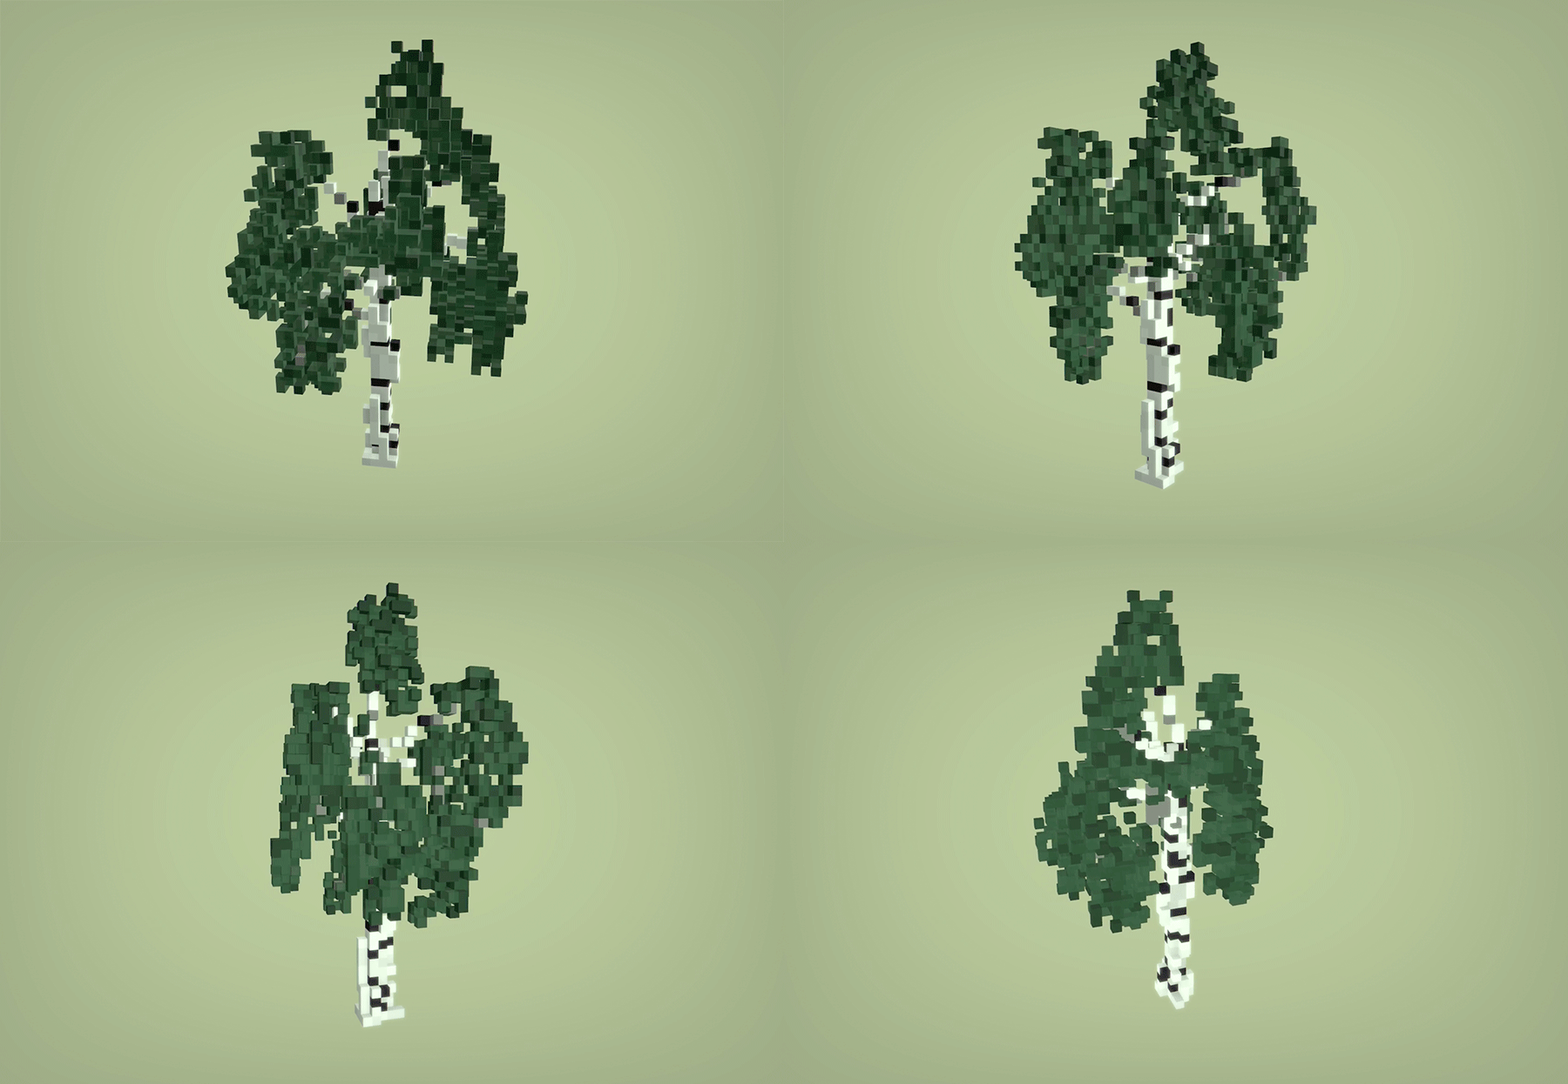
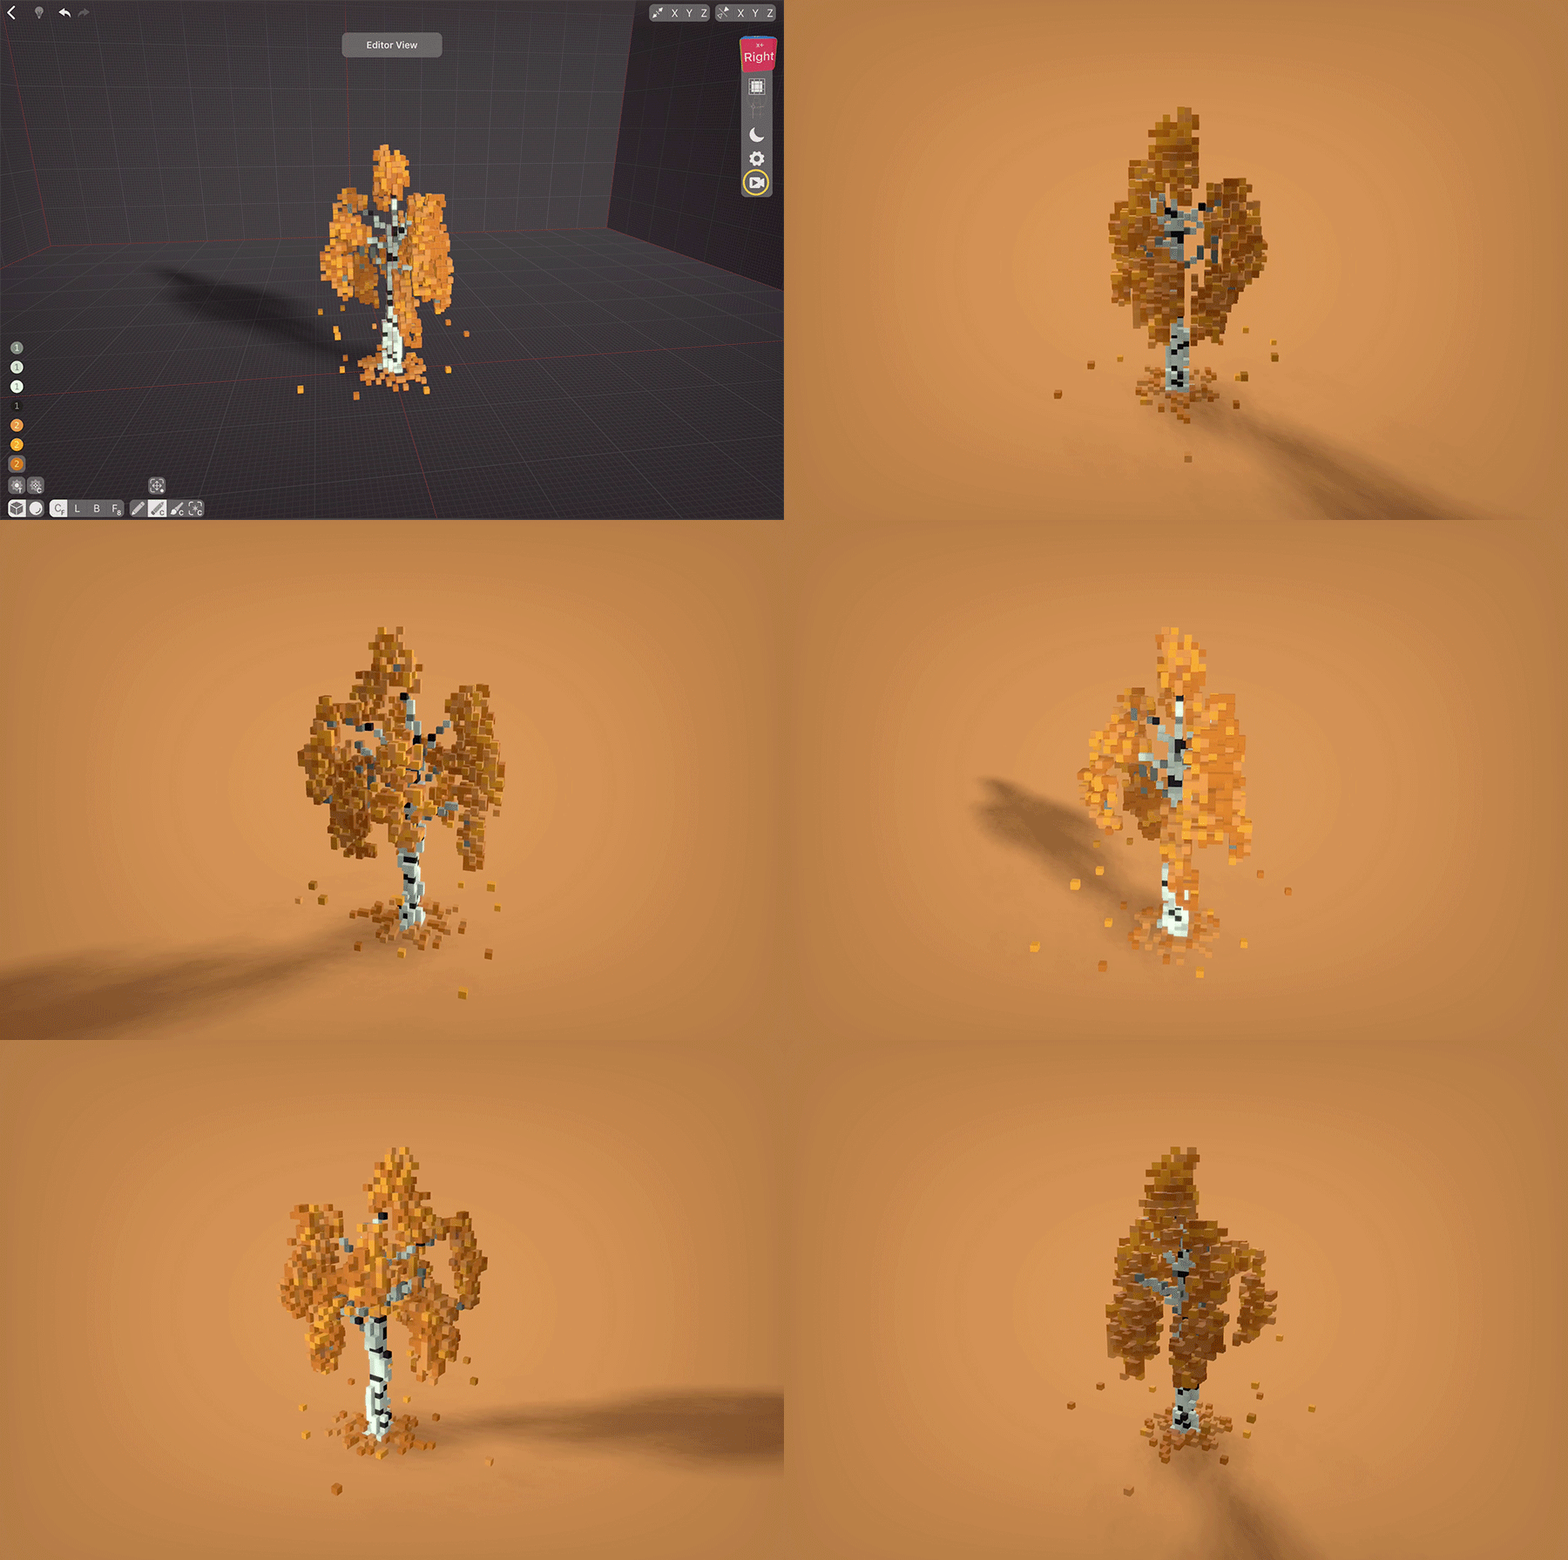
With VoxelMax, you can quickly export and share your models with your friends. Hold the Perspective Cube icon and then tap the Camera icon to enter Presentation View. Here, your model will start to rotate automatically. You can change the background colour by taping the colour icon. Background colour changes instantly, so you can easily see what works best for your model.
Once done with the background colour, you can adjust the viewing angle, and start the Playback to view the time-lapse of your creation.
Bonus
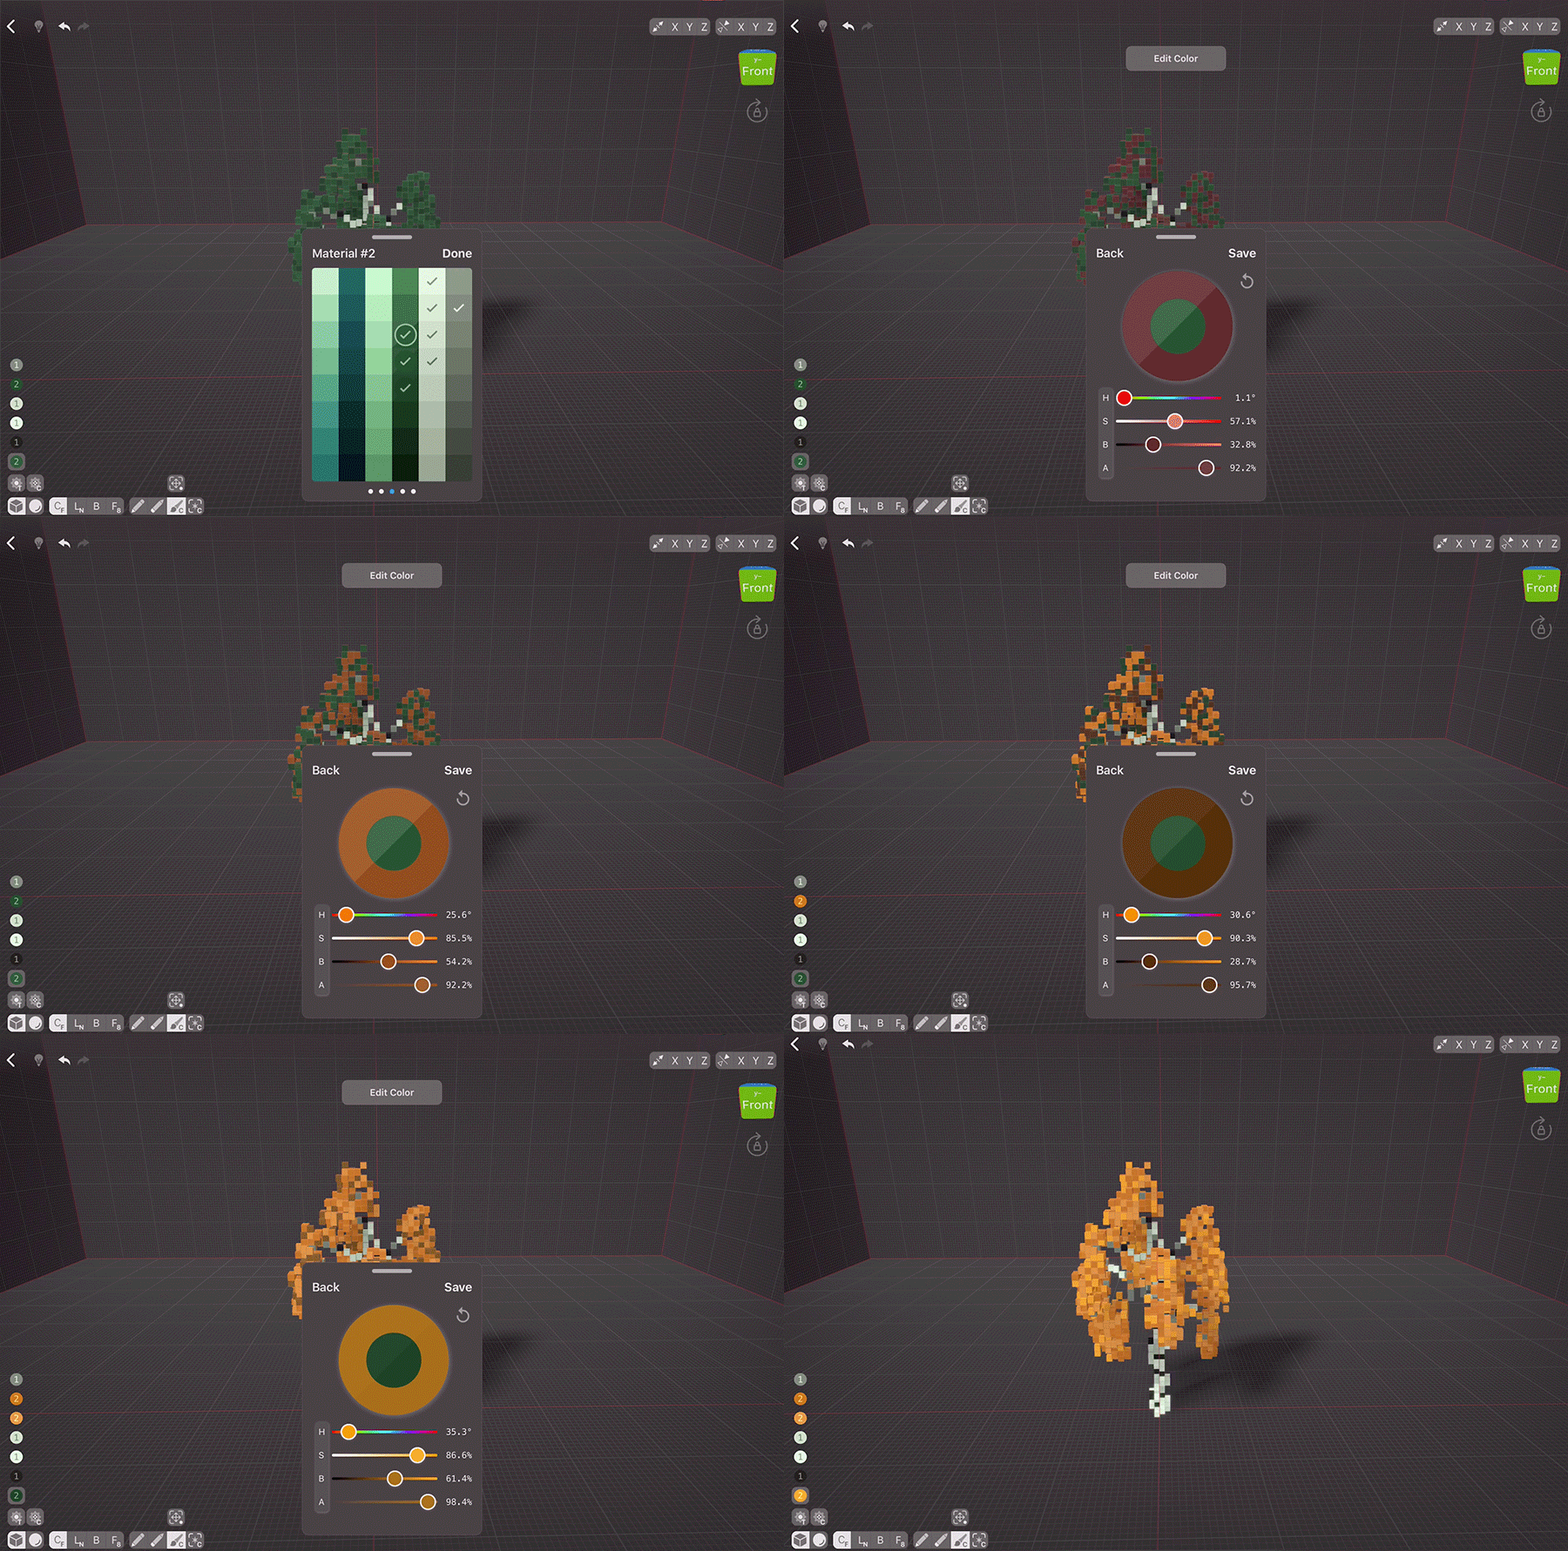
As Autumn is around the corner, let’s quickly create an Autumn version of our birch. We can either edit the existing file or play it safe and edit the duplicate. First, let’s adjust the colours. Go to the palette and tap each green colour, adjusting it with sliders to make it orange. Awesome!
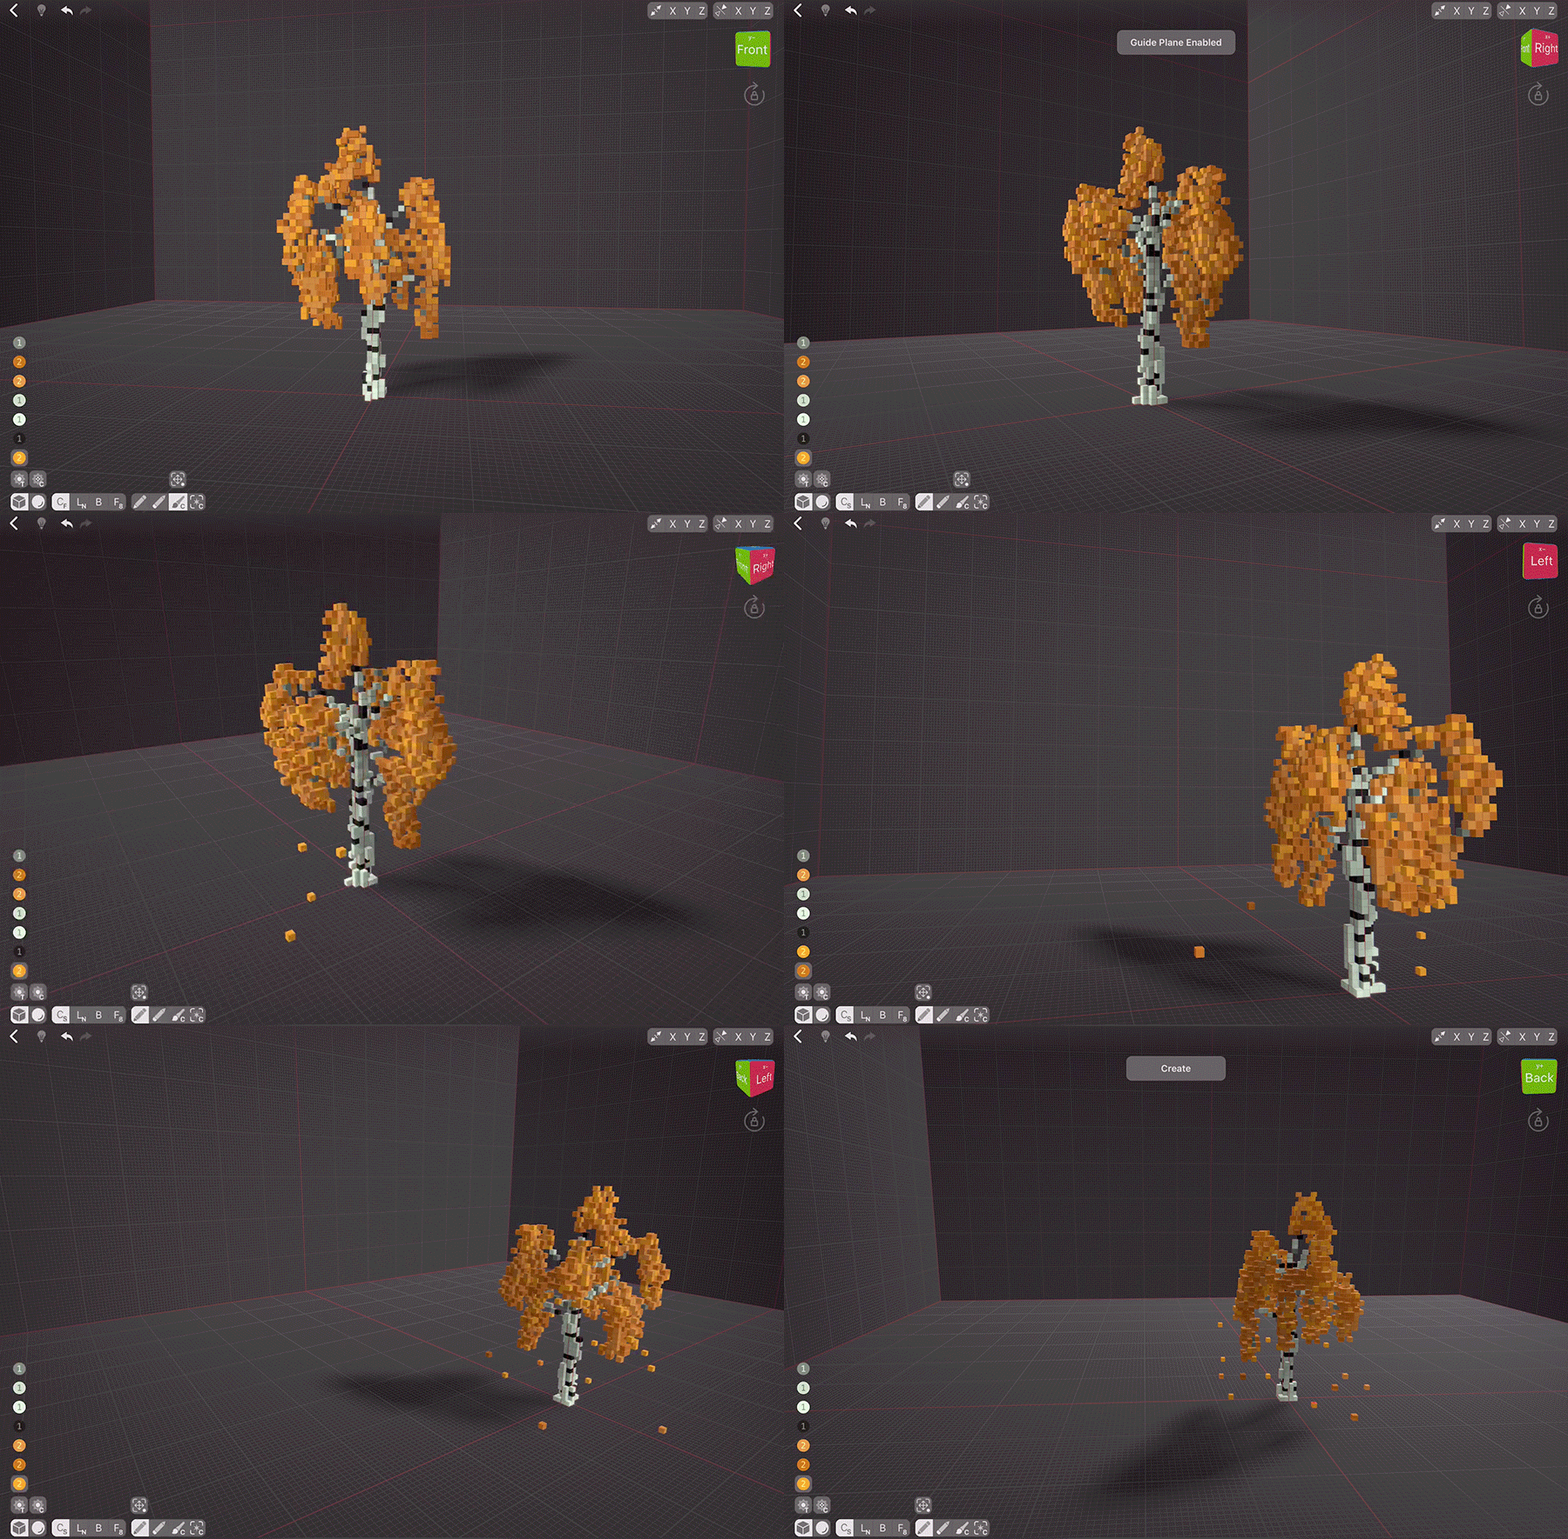
Let’s also add some falling leaves. To do that, we need to enable the Guide Plane. Hold the Perspective Cube and tap the second icon from the top. Now, let’s change our Centered Mode from Free Hand to Single. In Centered Single Mode each tap will get you one instant of your brush (either Create, Erase, Paint, or Select), and then you can move it around by dragging. With Guide Plane on, we can tap some of the leaves and then drag our voxel down as if it’s a falling leaf. Let’s make some of those!
Now, we need to add some leaves on the ground. Let’s switch back to Centered Free Hand Mode and create some voxels on several layers on the ground. If it looks too crowded, switch to Erase Color Mode to quickly trim the composition. Perfect! Looks like we’re done.
Now we can enjoy another version of our birch. I’ve changed the background colour, too, to enhance the Autumn mood of the scene.
To share your creation with friends, either take a screenshot or record a video with the screengrab.
Share your creations on social media and tag us in your posts so we could enjoy them together!

