Intro
When creating small models, it’s important to keep in mind that we need to enhance what’s important and make creative decisions when it comes to choosing our next step: should we add voxels here or just paint them to showcase some feature? How much texturing does this model need? Hopefully this tutorial will help you to make those choices both for this particular model and any other low-scale models you’ll create later
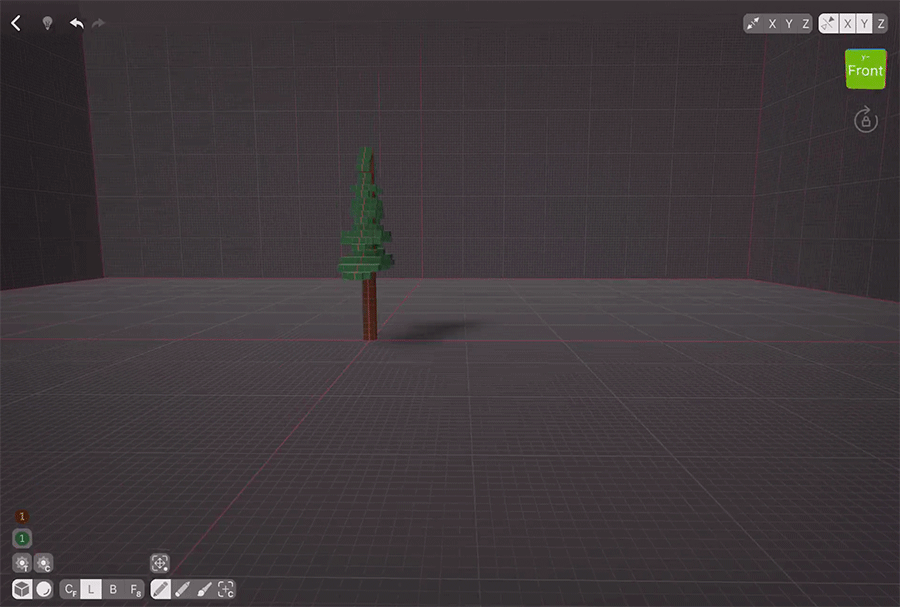
Creating The Trunk
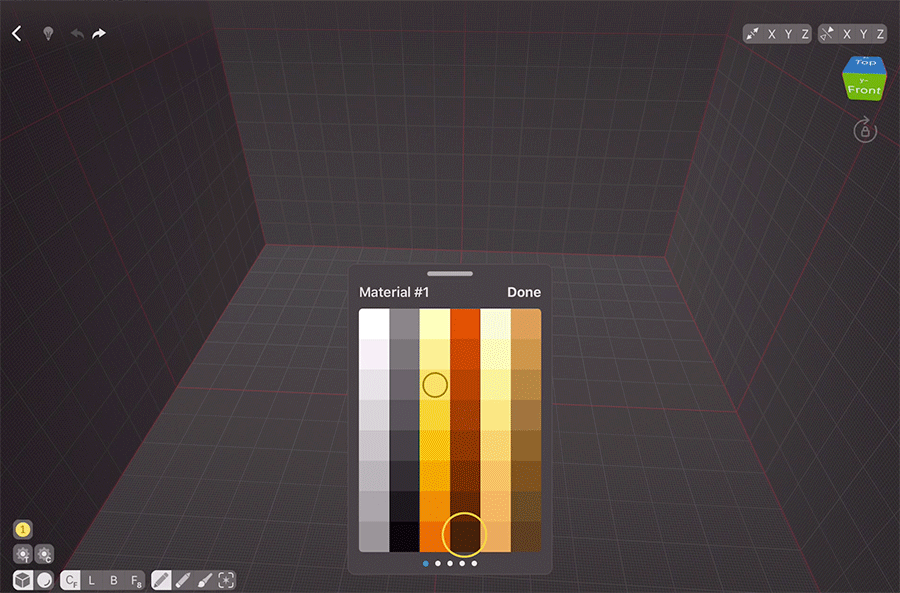
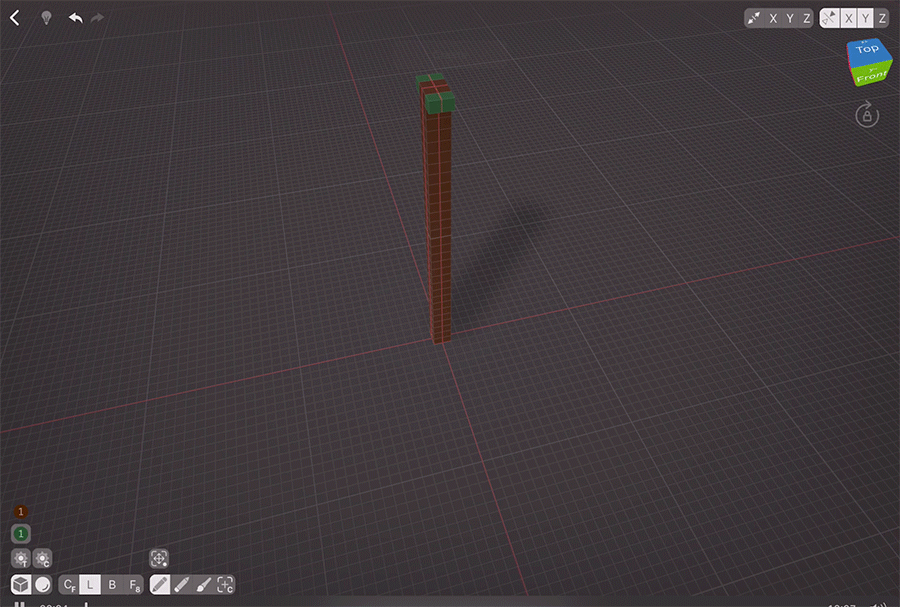
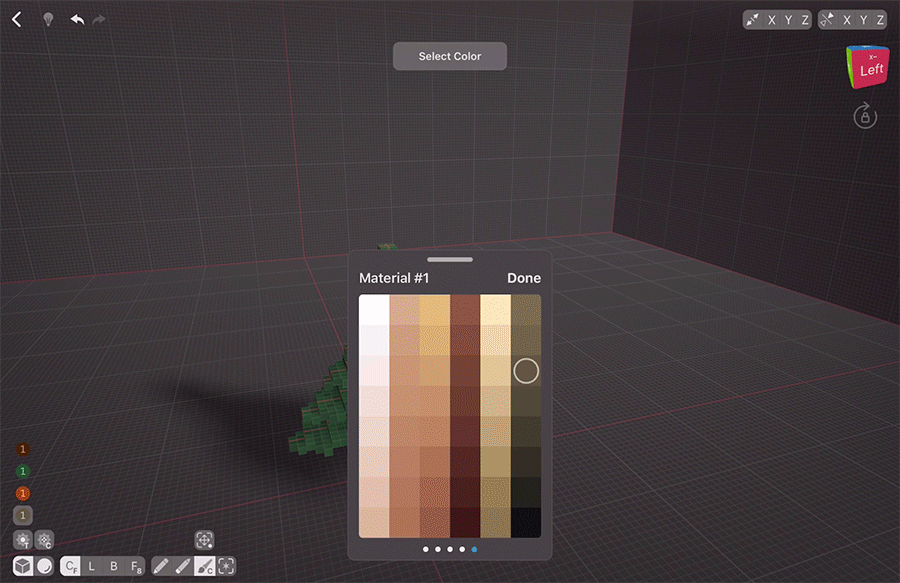
First of all, we need a starting point. Let’s enable Mirroring on X and Y axes to save us time, reduce the brush size to 1 voxel, select one of the tree colours, and choose the Linear Normal Mode. This mode creates (erases, paints, selects) a line of voxels that stands out from the tapped voxel face, so it’s perfect for trees, columns, legs and such. As mirroring works around the scene centre, we are going to tap the voxel that’s right next to the intersection of the red lines — they mark the mirroring axes. Let’s make it about 32 voxels tall. The fuller grid in VoxelMax is 16 voxels wide, so we need it to be approximately two units.
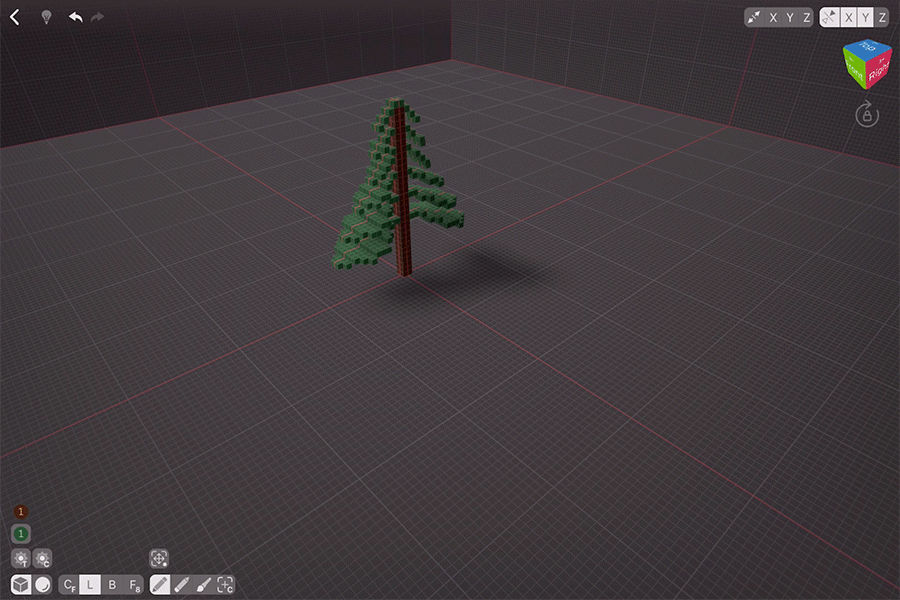
Creating First Branches
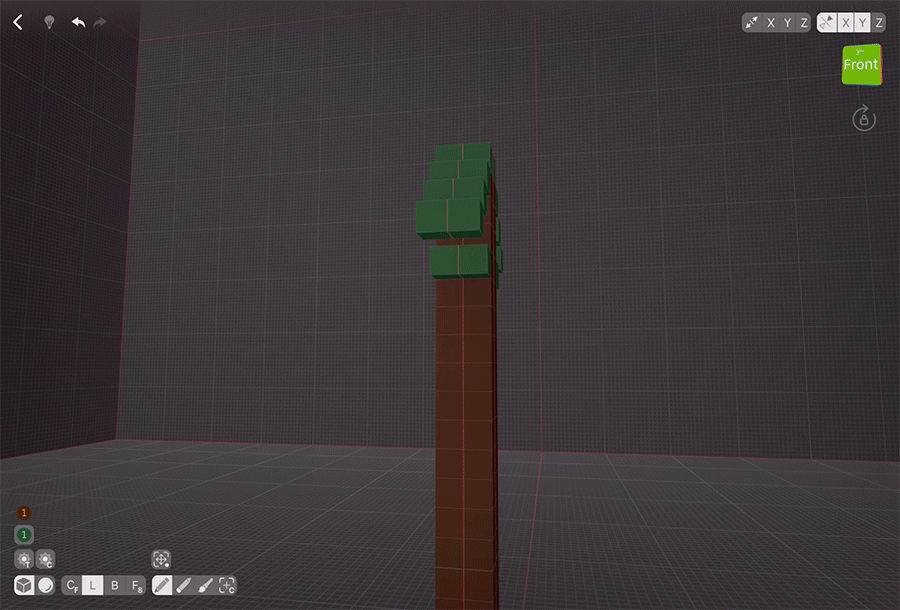
Let’s start creating branches from the top as this way we’ll have more control of what’s going on with our tree. We’ll be creating branches on two sides using the mirroring, and then we’ll automatically make them for the other two sides, so let’s focus on that. Let’s choose a deep green shade and use Line Mode to create our first branch. Let’s just go with a 45º lines for the top branches. To save tool switching, I’m just adding two lines and then deleting one row as it’s the quickest way to create those without switching tools on and off a lot.
For the second and third branches, let’s repeat the whole process, leaving a 2 voxel space between first and second branches. Then, let’s widen the branches a bit by adding few voxels in the middle to give our tree more volume.
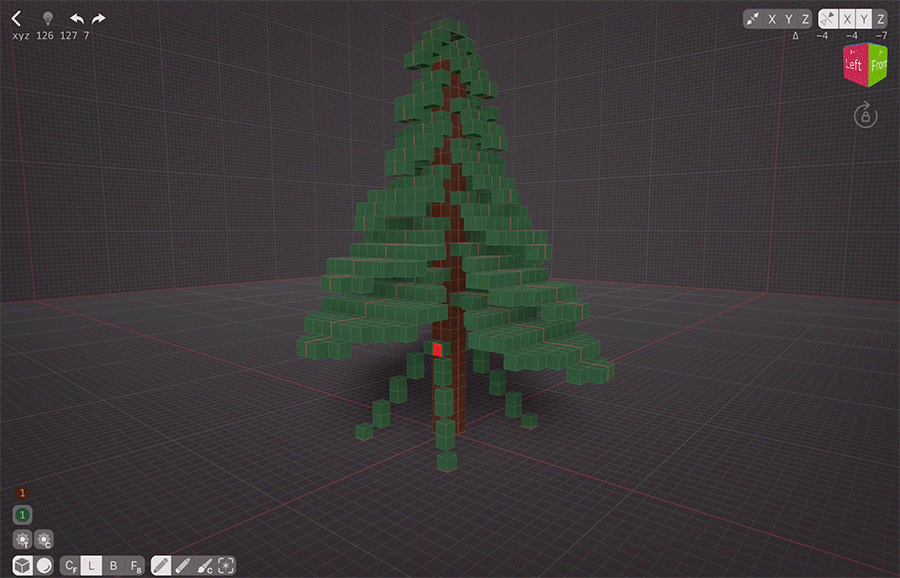
Developing The Fir Tree
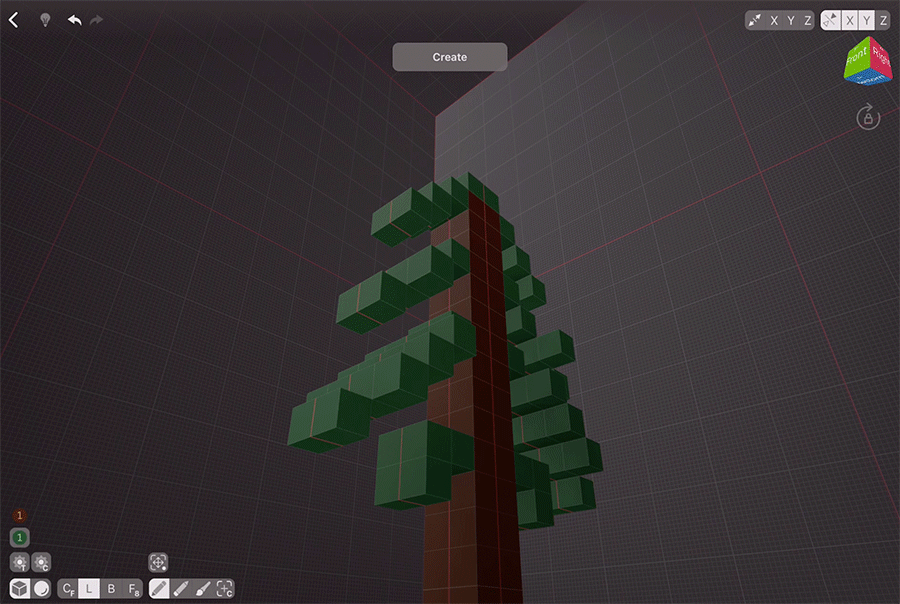
As we continue to develop our tree, we need to make our branches less sloping, as longer branches tend to go more to the side than to the ground. So, instead one voxel per layer, let’s make it several. Let’s make our branches even wider, too, making each next branch bigger than the previous one.
Checking How Things Look
While modelling virtually anything, it’s important to stand back every once in a while and check how our creations look from different angles. So far, so good, but I think we could use one more branch.
Bottom Branch

Let’s make another branch using the same process as we did before. Looks like we’re done with this side of the tree!
Duplicating The Branches
VoxelMax is very powerful when it comes to selecting, cloning, rotating and moving things. First of all, let’s choose the Selection Tool and tap it once to switch it to Colour Selection. Double-tap the fir trunk to quickly select it; now, hold the Selection Tool icon and scroll through the drop-down menu till “Invert Selection” option. Voila, all of our branches are easily selected. Next, let’s tap the icon above the Selection Tool till we see the Clone icon. Let’s choose the Clone Tool and simply drag our selection to the side.
Now we can rotate our selection. Tap the Clone Tool icon again till you reach the Rotation Tool. Rotation Tool is pretty straightforward: drag your selection in the direction you want it to rotate. Once happy with the way things look, release the screen. We’re going for an easy 90º rotation. Perfect!
Let’s now tap the Rotation Tool icon to reach the Move Tool. Move the rotated branches back to the tree. Now, some of you might prefer to make a perfectly symmetrical tree, but nature is rarely perfectly symmetrical; I suggest we go with a more natural approach here and move our branches two voxels up to create the illusion of randomness.
Filling The Gaps
What we need to do next is to fill in some gaps so our tree looks healthy. With the Line Mode, touch the trunk and connect it to the ground. This is where one of the coolest VoxelMax features comes in — Adjust Last Action Tool. With it, we can now use the Move Active Control Tool (icon above Create Tool) to adjust the position of our branch. Let’s put it at a reasonable level and add some width. After that, let’s add one more branch in the same way.
Now, remember, at the beginning of this tutorial I mentioned that for any low-scale models we need to decide what’s important. While we could add more filler brunches, I believe that would make our tree look messy. So let’s leave it like that.
Texturing The Foliage
Right now our tree looks quite ready, but a bit boring. Let’s make it more interesting with texturing. One of the amazing features that VoxelMax has is a Random Brush Color Tool. When activated, it paints not only with the selected colour from the palette, but with the colours around it as well. Let’s make our brush larger, disable the mirroring to make it look more interesting, and then choose the Paint Color Tool to restrict our texturing to the green colour only. Paint Color Tool only paints over the voxels of the same colour as the one you first touched. So, let’s start with the green voxel and quickly colour our leaves. Great!
Texturing The Trunk

I think our trunk could also use some texture to show the peeling bark. Let’s choose a lighter colour so our randomised brush won’t use colours of other shades, and quickly paint the trunk as well.
Fallen Needles
Our tree is done, but it still feels incomplete a bit. Firs normally loose a lot of needles during their lifetime, and this one is quite tall. Let’s add some fallen needles. With 1 voxel-sized brush and Random Brush Color Tool let’s choose a lighter colour to make our needles look Sun-dried, and add random lines at the bottom of our tree. Let’s layer them up a bit to make it more interesting.
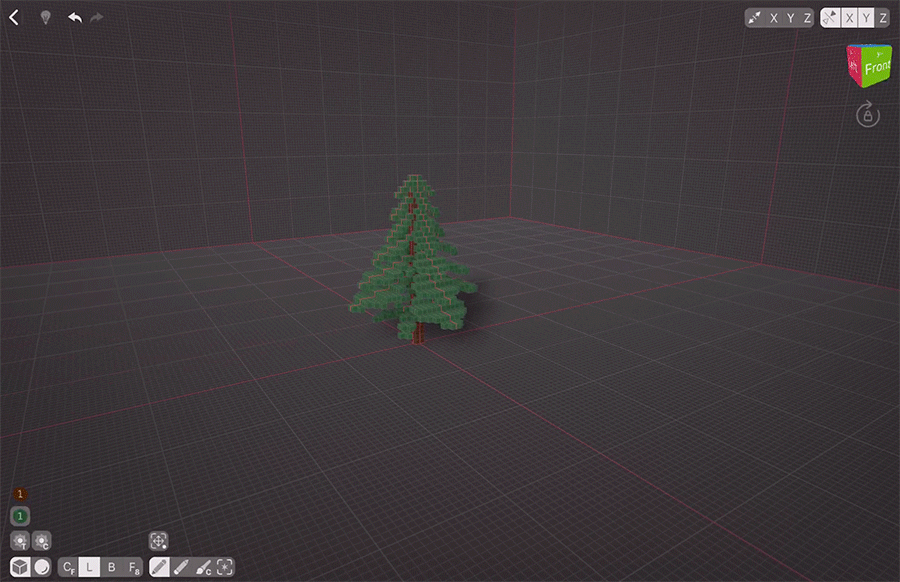
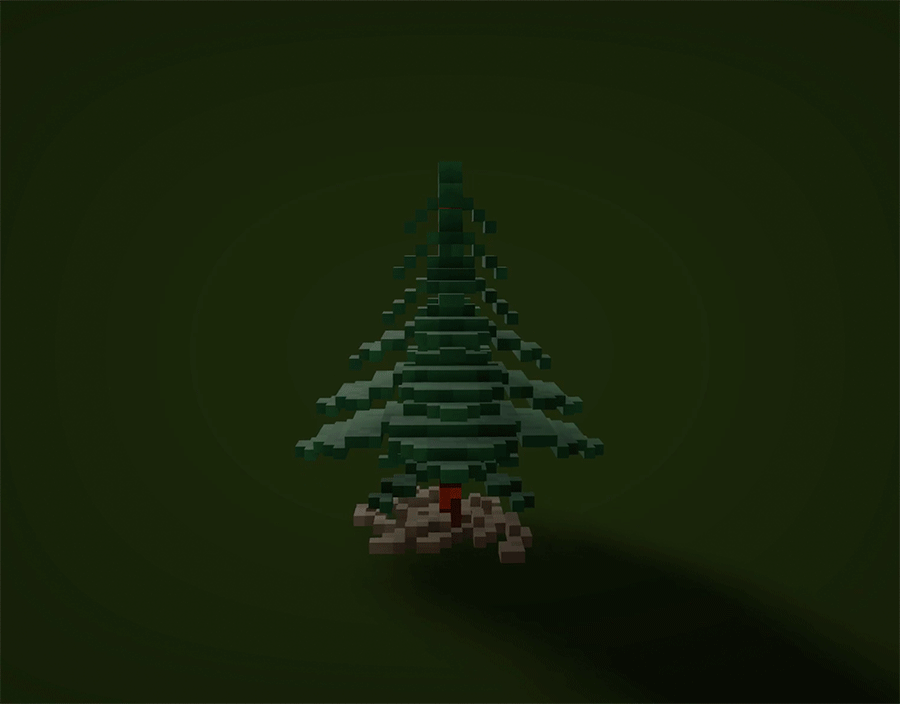
Our tree is now done!
Finished Creation
With VoxelMax, you can quickly export and share your models with your friends. Hold the Perspective Cube icon and then tap the Camera icon to enter Presentation View. Here, your model will start to rotate automatically. You can change the background colour by taping the colour icon, you can adjust the viewing angle, and start the Playback to view the time-lapse of your creation. To share your creation with friends, either take a screenshot or record a video with the screengrab.
Here’s my result:
Share your creations on social media and tag us in it so we could enjoy them together!