It is no secret that MagicaVoxel is one of the most powerful voxel editors for desktop computers. Looking at Voxel Max’s interface, it doesn’t have nearly as many buttons.
So how do its tools compare for an experienced MagicaVoxel user? Does this iOS app have the features needed to be useful as more than a mobile toy?
You might be surprised to learn that Voxel Max has almost all of the modeling features that MagicaVoxel has! Many are neatly bundled on the buttons you can see, or a combination of several tools will give the same results.
Many of Voxel Max’s buttons have menus that appear when you press and hold on the button.
The biggest difference is that Voxel Max does not have a ray-tracing render mode, which is more than made up for by having live PBR materials while editing, infinite undo history with construction playback, native screen recording with turntable spins, and an AR scene viewer.
Despite its slim UI, Voxel Max has a very flexible scene editor, unique and advanced sculpting tools, larger object volumes, similar palette options, and asset management with dozens of preset objects. Let’s take a look at MagicaVoxel in sections and see how to make the same or similar operations in Voxel Max.
MODEL EDITOR
TOP BAR
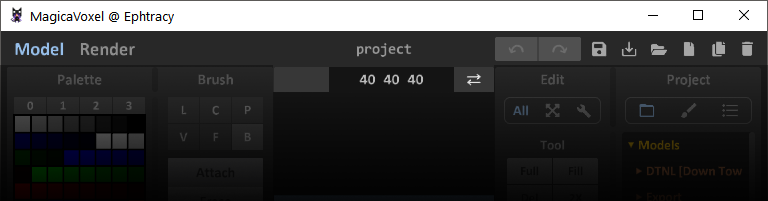
MagicaVoxel’s top bar.
The top left corner of the MagicaVoxel window lets you switch to the Renderer. While Voxel Max doesn’t have a dedicated ray-tracing mode, it does have Presenter View, which lets you replay construction, show a turntable view, see your project with different background colors and stackable filters, record the screen with a hidden UI, and activate AR mode to see your model in the real world! Pressing the back button in the left top corner will return you to the editor.
From Voxel Max’s editor, you can keep pressing the back button till you reach the project gallery. There you can press and hold on a project copy, move, duplicate, or delete, achieving the same file management goals as the buttons in the Top Right corner of MagicaVoxel.
Undo and Redo are available from Voxel Max’s top left corner, or you can use the iOS gestures swiping with three fingers to the left for undo, or three fingers to the right for redo.
Voxel Max does not have an option to set volume size for objects, but there is no need to do this. While you have a 256x256x256 space to create objects (more than 8 times what is available in MagicaVoxel), when you move to the Scene Editor (“World Editor” in MagicaVoxel), the bounding box of the object will automatically shrink to fit your built object.
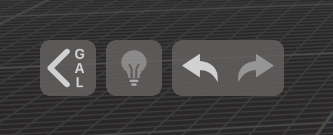
Voxel Max’s Back Button ( “SCN” for Scene or “GAL” for gallery), Hints toggling, and Undo/Redo.
The button to switch between World and Model Editors in MagicaVoxel has a couple of different options in Voxel Max. To go to the Scene Editor, press the “back” button in the top left corner, which displays “SCN” when editing an object. To edit an object from the scene, double-tap it (as long as double-tap support is enabled in the app settings (default). Otherwise, you can use the up and down arrows in the top right corner to navigate groups through bundled groups of objects and enter the Object Editor.
MagicaVoxel’s palette panel with color editor expanded and right-click menu over the swatches displayed.
PALETTE PANEL
MagicaVoxel allows a file to have a single 255 color palette. Voxel Max allows for each object to have a palette of 240 color swatches! This means you could use all 16,777,216 colors in the 24-bit True Color spectrum (though it would take 69,089 objects to do it…)
Palettes can be loaded in by copying an image from your photo library and using the V (paste) button on the main swatch palette. From whatever palette page you are on, the most common colors in the image will populate the swatches. You can’t save a palette to an image, but you can copy the palette to another object and copy the object between files.
At this time there are no options for making a blank palette with a single color, creating a color gradient, or picking a color from the screen space. While the “mask” option to remove unused colors is not available in VoxelMax, you can see what colors are used in an object by the checkmarks on the swatches.
EDITING COLORS
There aren’t as many options in Voxel Max for sorting color swatches, but you can copy and paste by double-tapping a swatch to edit it and using the C (copy) and V (paste) buttons to match the values on another swatch.
Just like in MagicaVoxel, you can toggle between HSV and RGB color modes by tapping the letters. In HSV mode, percentages display, while RGB shows both the numerical value and hex value.
SELECTING COLORS
MagicaVoxel lets you pick colors in several different places. In the palette panel, you can Select, Deselect, and Remove voxels of a certain color by right-clicking the appropriate swatch and using the pop-up menu.
To Select voxels of a certain color, chose it from the palette, or tap on a voxel with the Select Color Tool. Then press and hold on the Select Tool and choose “Select All” from the menu.
To Remove voxels of a certain color, use the selection process above, then press and hold on the Erase Tool and chose the “Selected” option from the menu.
To Deselect voxels of only a certain color while leaving the rest of your selection active, chose that color from the palette. Press and hold on the Select Color Tool and pick “Invert Selection” from the menu.
NOTE ON MATERIALS
Materials in Voxel Max are not tied into a render system like MagicaVoxel. They are part of the building experience and are not linked to the color swatches, so you can use different materials with the exact same swatch. Learn more about this here.
Voxel Max’s palette button in the bottom right corner which opens the Swatch Palette. Double tapping a swatch opens the Color Editor, or you can edit Materials from the menu above the swatches.
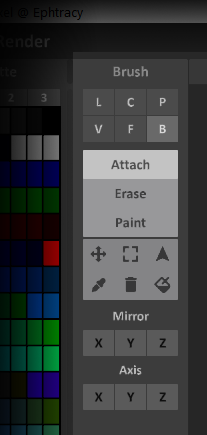
MagicaVoxel’s Brush Panel, with Modes on top, Tools in the middle, and Mirror/Axis options at the bottom.
BRUSH PANEL
BRUSH MODES
Line Mode - The Voxel Max equivalent is Linear Mode [L], which behaves the same as Line Mode with the “Straight” Option. “Project” is not available, but you can set cube or sphere brush widths for thick lines, and project lines from from the surface of an object like an extrusion: Linear Mode - Normal [Ln].
Center Mode - This mode behaves very differently from Voxel Max’s own Centered Mode - Single [Cs], but similar results can be achieved. Choosing x1 from the Stretch Menu on the appropriate axis will make your cube or sphere brush a flat circle or square. The size of the square or circle can be set by the brush size or using varied pressure. Currently all cube and sphere brush sizes are odd numbered, but you can place them in the center of the ground plane with X and Y Mirroring enabled to create even numbered widths.
Pattern Mode - Voxel Max does not currently have a way to repeatedly stamp a voxel pattern, but you can do something similar with the Clone Tool. After each clone you can switch to the Move and Rotate Tools to adjust the clone position. You can pick objects from the Asset Manager to move into your scene, but that creates a new object, and cannot be placed inside an existing object.
Voxel Mode - This is exactly like Centered Mode Free Hand [Cf], which lets you draw free hand lines using the shape and size of your selected brush.
Face Mode - Face Mode in Voxel Max is very similar to MagicaVoxel. You can tap it repeatedly to switch between diagonally touching voxels being included in the action [F8] or not [F4]. By changing the selected tool to its color version, you can edit a single color of voxels without bothering other voxels on the same plane. However, if you’re using the Create - Color Tool, the selected palette color will be ignored and the new voxels will match the face they’re extruded from.
Box Mode - Box Mode [B] in Voxel Max works exactly the same, but has an additional Box Mode - Stretch, which applies your action stretch across the entire object perpendicular to the face you tapped. This is helpful for making odd selections and painting through an object to the opposite side.
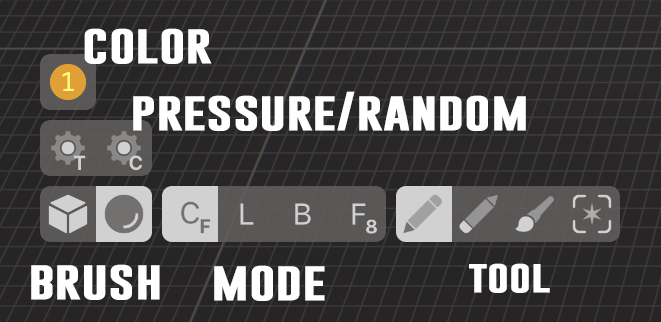
Voxel Max’s tool area. Under the palette button are texture and color settings, allowing for randomization and pressure sensitivity. In the bottom corner are the cubic and spherical brush selectors with size sliders. Each Mode has two types, and each of the 4 main tools have color based versions. The main tools also have menus bundled when you press and hold on them. Additional tools appear above the main tools when an active control point can be adjusted or a selection has been made.
BRUSH TOOLS
Each tool has an additional “color” version that changes the behavior and displays a small C next to the tool icon. Repeatedly tapping a tool button toggles between normal and color types.
Attach - Voxel Max calls this the Create Tool, which adds voxels to the object using any of the selected Modes. The Create - Color Tool ignores the selected palette swatch and creates voxels in the same color as the first voxel tapped.
Erase - The Erase Tool works the same in both programs, but the Erase - Color Tool will only erase voxels of the same color as the first voxel pressed, making it easy to use a single color as a “sacrificial” support for floating parts and measurements that can be erased away later.
Paint - The Paint Tool also works the same in both programs, but the Paint - Color Tool will only recolonization voxels that match the first voxel pressed.
Region Select - The Selection Tool in Voxel Max behaves like a normal brush, allowing you to “paint” a selection the same way you’d use the Paint Tool to apply color. It works with all four modes, and has a large bundled menu to expand or contract selections, select all, invert selection, and more. The Select - Color Tool is the alternate tool used in the “Selecting Colors Section”.
Move - Voxel Max’s Move Tool only appears when a Control Point can be moved, or if a selection has been made. This is true for Rotate, Clone, and Scale as well, which all appear above the last tool used.
Box Select - While MagicaVoxel has a dedicated Box Selection tool, Voxel Max can do the same thing by using the Select Tool with Box Mode activated.
Rectangle Select - MagicaVoxel’s rectangle select grabs all voxels behind a 2D rectangle on the screen area, cutting through models diagonally if the camera is angled, or grabbing a clean cross-section when viewing at 90º angles in orthogonal perspective. Voxel Max doesn’t have an equivalent for the diagonal selection, but it can make cross-section at any camera angle and perspective by using the Selection Tool with Box - Stretch Mode.
Color Picker, Remove Voxel Color, and Replace Voxel Color - These buttons perform the same functions as the right-click menu on the palette. See “Selecting Colors” above.
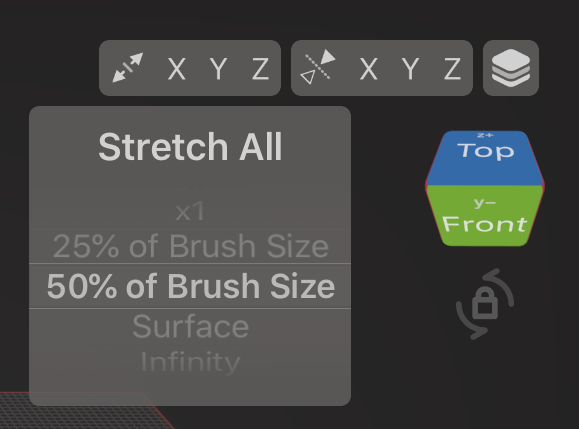
Stretch and Mirror controls from the top right corner of Voxel Max with the Stretch menu displayed. The Asset Manager button is in the very corner above the View Cube and view rotation lock.
MIRRORING
X, Y, and Z axis mirroring can all be enabled the same way using the Mirroring Menu in the top right corner of Voxel Max. You can even enable/disable all of them at once using the mirror icon to the left of the XYZ buttons.
AXIS
Voxel Max calls the XYZ axis Stretch. The Stretch Menu is next to the Mirror Menu, and has a few extra options when you hold on the buttons. Each axis can be individually set for a separate menu control. X1 will flatten that axis to a single voxel. 25% and 50% will shrink that axis on a brush, allowing for irregular rectangle brushes and ellipsoids instead of cubes and spheres. Surface will stretch the brush to the edge of the object volume (making very long ellipsoids), and infinity stretches sphere brushes into columns.
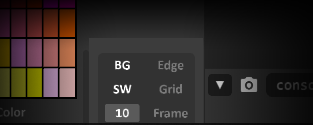
MagicaVoxel’s view options underneath the Brush Panel.
VIEW OPTIONS
Display Edge - Voxel Max does not have a edge display mode, but you can enable an edge tracing filter in Presenter View for an screenshots and video recordings.
Display Grid - Pressing and holding on the View Cube will show a menu with an option to toggle the object grid. The grid on the ground plane always displays.
Display Frame - Voxel Max displays a 32x32 grid frame by default. When the object grid is enabled, the bold 32nd lines and center axis lines are also visible on the object.
Display Ground - There is no option to hide the floor grid while editing, or display a ground plane in Presenter View, but you can toggle the side wall grids from the app settings.
Display Background - In Presenter View you can select a background color to compliment your scene.
Display Shadow - Shadows (as well as emissive bloom and PBR materials) can be toggled on and off from the app settings. Turning these settings off will give increased performance on older devices, especially on busy scenes.
Display Wireframe (only in World Editor) - In the Scene Editor, object bounding boxes are hidden unless the object is selected.
Voxel Max’s Presenter View with Outline filter activated.
BOTTOM BAR
MagicaVoxel’s bottom bar, containing a screenshot tool, powerful console command interface, and additional view options.
SCREENSHOT
Voxel Max doesn’t need a dedicated screenshot button because iOS has a convenient built in system for that. The buttons to do this vary from device to device, but usually it’s the home button + lock button, or volume down + lock button if your device doesn’t have a home button.
To get the best screenshots, make sure to enable PBR, Shadows, and Bloom from Settings, and use Presenter Mode from the View Cube Menu. In Presenter Mode you can select the background color and enable cool filters. Press and hold on the screen to stop the turntable spin and tap once to hide the interface.
For really amazing screenshots, you can put your models in the real world by pressing the AR button and allowing access to the camera. Once the app senses a flat area it can place the object, you can move, scale, and rotate it how you want. Then you can walk around and even inside your scenes.
There is also a built in screen recorder that will capture your turntable, build playback, and AR scene without notifications or UI elements getting in the way. Once it’s done recording, you can trim the video before saving it to the Photos app.
TOOL TIPS
MagicaVoxel displays tool tips when hovering over buttons. By activating the lightbulb icon in the top left corner, Voxel Max will display a tool tip pop up on the screen when tapping most buttons and menus.
CAMERA PROJECTIONS
Perspective - This is Voxel Max’s default view. The camera rotates around a center point which can be moved or set to the last action made.
Free - There is no equivalent to this in Voxel Max. This type of view works better with a mouse and keyboard and doesn’t translate well to touch screens without added “thumb sticks” like first person shooter games.
Orthogonal - This disables linear perspective so objects do not get smaller as they move further away from the camera. Double tapping Voxel Max’s View Cube will toggle between Perspective and Orthogonal views.
Isometric - Isometric view is the same as orthogonal, but locked to a 45º angle so three sides of a voxel are visible at once and form symmetrical diamond shaped faces. Swiping across the View Cube will snap it in 45º increments.
See isometric view in Voxel Max demonstrated.
RULER
MagicaVoxel’s ruler lets you fine tune the camera angle in 5º increments. There isn’t a similar option in Voxel Max yet.
RESET CAMERA
Voxel Max does not have a “default” camera view, nor can it save camera positions like MagicaVoxel. However, you can tap the View Cube once to center the screen on the last action made, and tap a second time to snap the camera to a 90º angle.
CONSOLE COMMANDS
MagicaVoxel displays info about the current operation being made in the console, like the depth of an extrusion or the size of a box being created. Voxel Max displays this data just above the View Cube.
There are no tools similar to MagicaVoxel’s console commands at this time, but most of the commands are also buttons available in the MagicaVoxel’s Edit Panel, which we’ll be looking at next.
EDIT PANEL
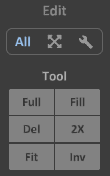
TOOL
Full - This fills the entire object volume. Turning on Stretch All - Infinity in Voxel Max and using the Create Tool will do the same.
Fill - This colors all voxels the same color. Use Stretch All - Infinity and the Paint Tool, or Select All and Paint Selected from the Paint Tool menu.
Del - You can delete all voxels in an object by using Stretch All - Infinity and the Erase tool, or Select All and Erase Selected from the Erase Tool menu.
Inv - This command inverts negative space to voxels and removes all existing voxels. So a sphere would become a filled volume with a hole inside. You can accomplish this in Voxel Max by Selecting All, turning on Stretch All and using a create tool to totally fill the object space, then using Erase Selected.
See how to execute Full, Fill, Delete, and Invert actions.
2x - After making a Create, Erase, or Paint action in Centered, Linear, or Box modes, you can activate the Scale Tool to modify what you last did. You can also scale objects non-destructively from the Scene Editor. There isn’t an exact option to double the object size like MagicaVoxel’s 2X.
Fit - Object bounds automatically shrink to fit the model when you move to the Scene Editor, so manual fitting isn’t needed.
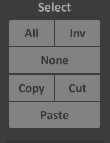
SELECT
All, Inv, and None - These commands are available in the Selection Menu (press and hold on the Selection Tool).
Copy, Cut, and Paste - Voxel Max doesn’t exactly have a “copy” for voxels in the Object Editor, but you can use the Clone tool to duplicate selections. Instead of “cut” Voxel Max can use the Extract command in the Create Tool menu to duplicate a selection or the whole object to a new object in the scene. In the Scene Editor, Copy, Cut, and Paste are all available from the Asset Manager panel.
ROT
The object editor doesn’t have a shortcut for 90º rotations, but the Rotate Tool snaps selections in 6º increments so it’s easy to accomplish 90º rotations.
FLIP
After making a selection, you can turn on mirroring for the needed axis and tap with the move tool to flip the selection in place, or drag to a new position. If you want to flip the whole model without making a selection, press and hold on the preferred mirror axis and select the “Flip” command.

LOOP
Loop is just a fancy term for bumping the object around the volume. Both MagicaVoxel and Voxel Max automatically loop voxels that go past the edge of the object volume to the opposite side. You can easily translate selected voxel around the volume with the Move Tool, but there isn’t currently a way to “bump” objects on a single axis one voxel at a time like you can with Loop.
SCALE
Scaling inside the object editor can only be done with Control Points. Scaling is not available to selections, just to adjusting certain points around the last action made. However, the Scene Editor has very flexible scaling, allowing you to shrink or enlarge objects in 1/5th increments. This is none-destructive and doesn’t impact the voxels inside the object at all.
ROTATE
Although Voxel Max no longer has the ability for rotating freely to any angle, you can still make the 6º rotations in the Scene Editor, and there it is non-destructive, so you can put voxels at angles to each other, and return them to their original position without jumbling up the model.
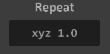
REPEAT
The Repeat feature is pretty unique tool. Although Voxel Max doesn’t have the same formula approach to creating 3D patterns of repeated objects, you can still use the Select and Clone Tools to create patterns.
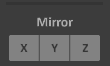
MIRROR
See “Mirroring” in the “Brush Panel” section.
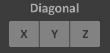
DIAGONAL
Diagonal mirroring in MagicaVoxel is a little confusing. Combining rotation and mirroring commands in VoxelMax should achieve a similar effect.
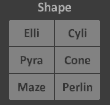
SHAPE
Elli - Large ellipses can be made in Voxel Max by using a sphere brush then using the Scale Tool to fit your needs.
Cyli - Cylinders can be made with a sphere brush and the Linear - Normal Mode. To make the dome at the end flat, turn on Stretch - X1 for the direction you’ll be extruding the cylinder.
Pyra - Pyramids are shaped with curved edges in Voxel Max. Using a size 1 square brush, make a height of the pyramid with Linear - Normal Mode, then scale the Control Point at the bottom to the size of the base you want. The brush size sets the minimum scale, so you can make flat topped pyramids with a larger brush.
Cone - Cones are made the same way as pyramids but with a spherical brush.
See how to make Pyramids and Cones in both MagicaVoxel and Voxel Max.
Maze and Perlin - There is no equivalent for the maze or Perlin noise generators at this time.
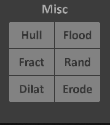
MISC
All of the Miscellaneous tools in MagicaVoxel are not available yet in Voxel Max, with the exception of random voxel generation. Instead of being able to create noise in a selected area, you can actually Create, Paint, and Erase with pressure sensitive noise. Follow the links to learn more about how to control color randomization and texture randomization.
WORLD EDITOR
Several of MagicaVoxel’s panels are available in multiple parts of the program. We’re moving to the next section now because these features are best represented in Voxel Max’s Scene Editor alone.
MagicaVoxel’s world editor, where you can assemble many objects to form a larger scene.
MagicaVoxel’s Project/Pattern/Outline Panel, with Export menu expanded at the bottom.
PROJECT PANEL
PROJECT [folder icon]
In Voxel Max, this panel is basically a shortcut to the Open window that displays your MagicaVoxel object library (if you use it). Using the back button in the top left corner of Voxel Max to go the Scene Editor [SCN] then the file Gallery [GAL] which will open right to Voxel Max’s folder on your iPad or iPhone.
PATTERN [brush icon]
As mentioned before, there is no pattern brush tool in Voxel Max. However, when you press the Add Object button [+] in the top right, it will open the Asset Manager. You can add assets from the many included packages for a quick start, a blank object represented by the empty square, or add a new set of assets from your device by clicking the large plus sign.
You will be prompted to select a Voxel Max file, which will load each unique object into a new section titled after the file. This is a great way to share your models with others, who can easy drop them into their own scene.
Outline [list icon]
Just like MagicaVoxel, you can see a list of all the objects and groups in your file. The layers icon in the top right corner will bring up a different part of the asset manager that shows all objects and groups. Groups and subgroups can be examined to see the contents. You can also just directly into any object to edit it from the asset manager.
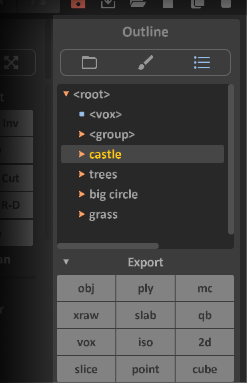
Voxel Max’s Export Menu with multiple object groups selected.
EXPORT
From the Voxel Max Asset Manager, you can press and hold on any object or group to bring up the Object Menu. Pressing “Share” will let you select from a variety of export options. You can learn more about these options in the Voxel Max Update 1.3 video.
WORLD PANEL
SELECT
MagicaVoxel and Voxel Max feature similar tap to select, add/subtract selection, and rectangular marquee selection options. While MagicaVoxel can bundle them all as a single tool with different operator keys and mouse clicks, Voxel Max has dedicated buttons for New, Expand, Contract, and Select Area. When Select Area is disabled, you are able to use the Move, Clone, Rotate, Scale, Align, and Distribution Tools.
FREE MOVE
MagicaVoxel can use Free Move to place objects on other objects as if they were a solid surface. This is great for doing things like putting figures on a rounded hill, which would normally be tedious adjusting to make sure they don’t clip into the ground. Voxel Max doesn’t have an equivalent for this in the Scene Editor, but you can achieve similar goals in the Object Editor. When building in a new object, other objects in the scene are “solid”, so you can build off of them as if they were inside the same object space. Even if they’re scaled or rotated at and angle, the new voxels will be placed outside of the other objects in your scene. If you don’t like this behavior, you can hide the objects using the eye icon in the Asset Manager, and build voxels through the previously occupied space.
See Free Move and Voxel Max’s object sensitive drawing demonstrated.
PICK COLOR
You cannot select colors from the Scene Editor in Voxel Max. However, you can use the Object Menu from the Asset Manager to copy and paste color palettes from one object to another.
OBJECT NAME
Currently names cannot be set for objects and groups, but that is planned for a future update.
LAYERS
There is no layer feature in Voxel Max at this time.
EDIT PANEL
SELECT
All, Inv, and None - All of these options are also in Voxel Max’s Scene Editor and can be accessed by pressing and holding on the Select Tool button just like in the Object Editor.
Copy and Cut - are available in the Asset Manager’s Object Menu.
Paste - After using Copy or Cut, the Paste [V] button at the bottom of the Asset Manager will be available.
BOOLEAN - UNION
The Union feature to combine two objects into one is not a feature at this time.
ROT, FLIP, AND MOVE
These are all mentioned above in the Model Editor > Edit Panel section (Move is called Loop there). The only button not talked about before is the Ground button which snaps a model down to the world grid which Voxel Max doesn’t have.
ALIGN
Voxel Max has a powerful (and arguably more intuitive than MagicaVoxel’s) Align Tool. After selecting multiple object (with the last touched object being the highlighted “active” one), you can drag to align all objects to the active one. They can line up all on the active object’s center, to the center of the its edges, or to its corners. Depending on how far you pull, you will align the other objects on their edges or centers.
HIDE
As mentioned in the “Free Move” section above, you can Hide or Show objects and groups from the eye icon in the Asset Manager. There’s even a Select All button to make it easier to hide everything at once, which is useful if you’re in the object editor and want to isolate what you’re working on.
ORDER
There’s no option to order objects in the Asset Manager, but if you cut and paste a group or object, they will go to the bottom of the groups or objects listed (group always appear above the objects in the Asset Manager).
RENDERER
As mentioned before, there is no dedicated rendering mode in Voxel Max, but there are still a few things we can learn about.
LIGHT PANEL
The qualities of the scene illumination cannot be adjusted, but you can set the direction of the light. Tapping once on any of the View Cube’s sides will move the origin of the light to that side. This is helpful for creating dramatic shadows and hot metallic reflections.
In the Model Editor > View Options section were mentioned settings related to background color, edge tracing, grid display, and shading. Additional filters are available for options such as pixelation.
Setting the background color in Voxel Max’s Presenter View.
MATTER PANEL
From the top of the swatch panel you can set up different material rendering layers. Eight different layers are available and the same color swatch can use different material layers on different voxels. All of this is object based, so different objects can also have different material layers if needed.
Unlike MagicaVoxel’s separated material types, a rendering layer can use more traditional sliders that allow any type of setting in a single material. Diffuse is the default option with a high “Rough” setting. Metalness and Emission (Glow) are the other two sliders. Shadows can also be toggled off on a per-material basis, perfect for letting light cast through windows. Speaking of windows, you can have transparent voxel, but this is not a material setting. When editing colors, the bottom slider controls the swatch’s alpha. This means that transparency is controlled by the texture PNG. For best results, keep all transparent objects on the bottom material #8, otherwise it will be possible to see into the sides of adjacent opaque voxels.
Already mentioned before in the View Options is Bloom, which is a simple on/off toggle. To control the amount and saturation of bloom, you can adjust the level of emission in the material layer, and the brightness and saturation of the color swatch.
Finally, leaving where we started off this article: a turntable animation can be produced on a color background or AR view using the Presenter View and the built in recording tool.
If there are any things you do in MagicaVoxel or another voxel program that you’d like to do in Voxel Max, put it in a comment below and we’ll try to see if it’s something that can already be done, or if it should go on the list of features to be added as development continues.
Check out this video where we look at some of the actions mentioned above if you’d like to see the app in action.